Spring Sewing - New Swimwear pieces

Today is March 1st, which means spring and summer are right around the corner! Spring break is coming up in a few weeks and that always calls for some new swimwear! I love the idea of mixing and matching my swimsuits, so I tend to make separates that can pair with different pieces. For this swim capsule, I made all tops to pair with store bought bottoms I already have in my closet. I already have both high and low waisted bikini bottoms in both solid navy and solid black, so I wanted pieces I could wear with those depending on how much coverage I wanted on a particular day.

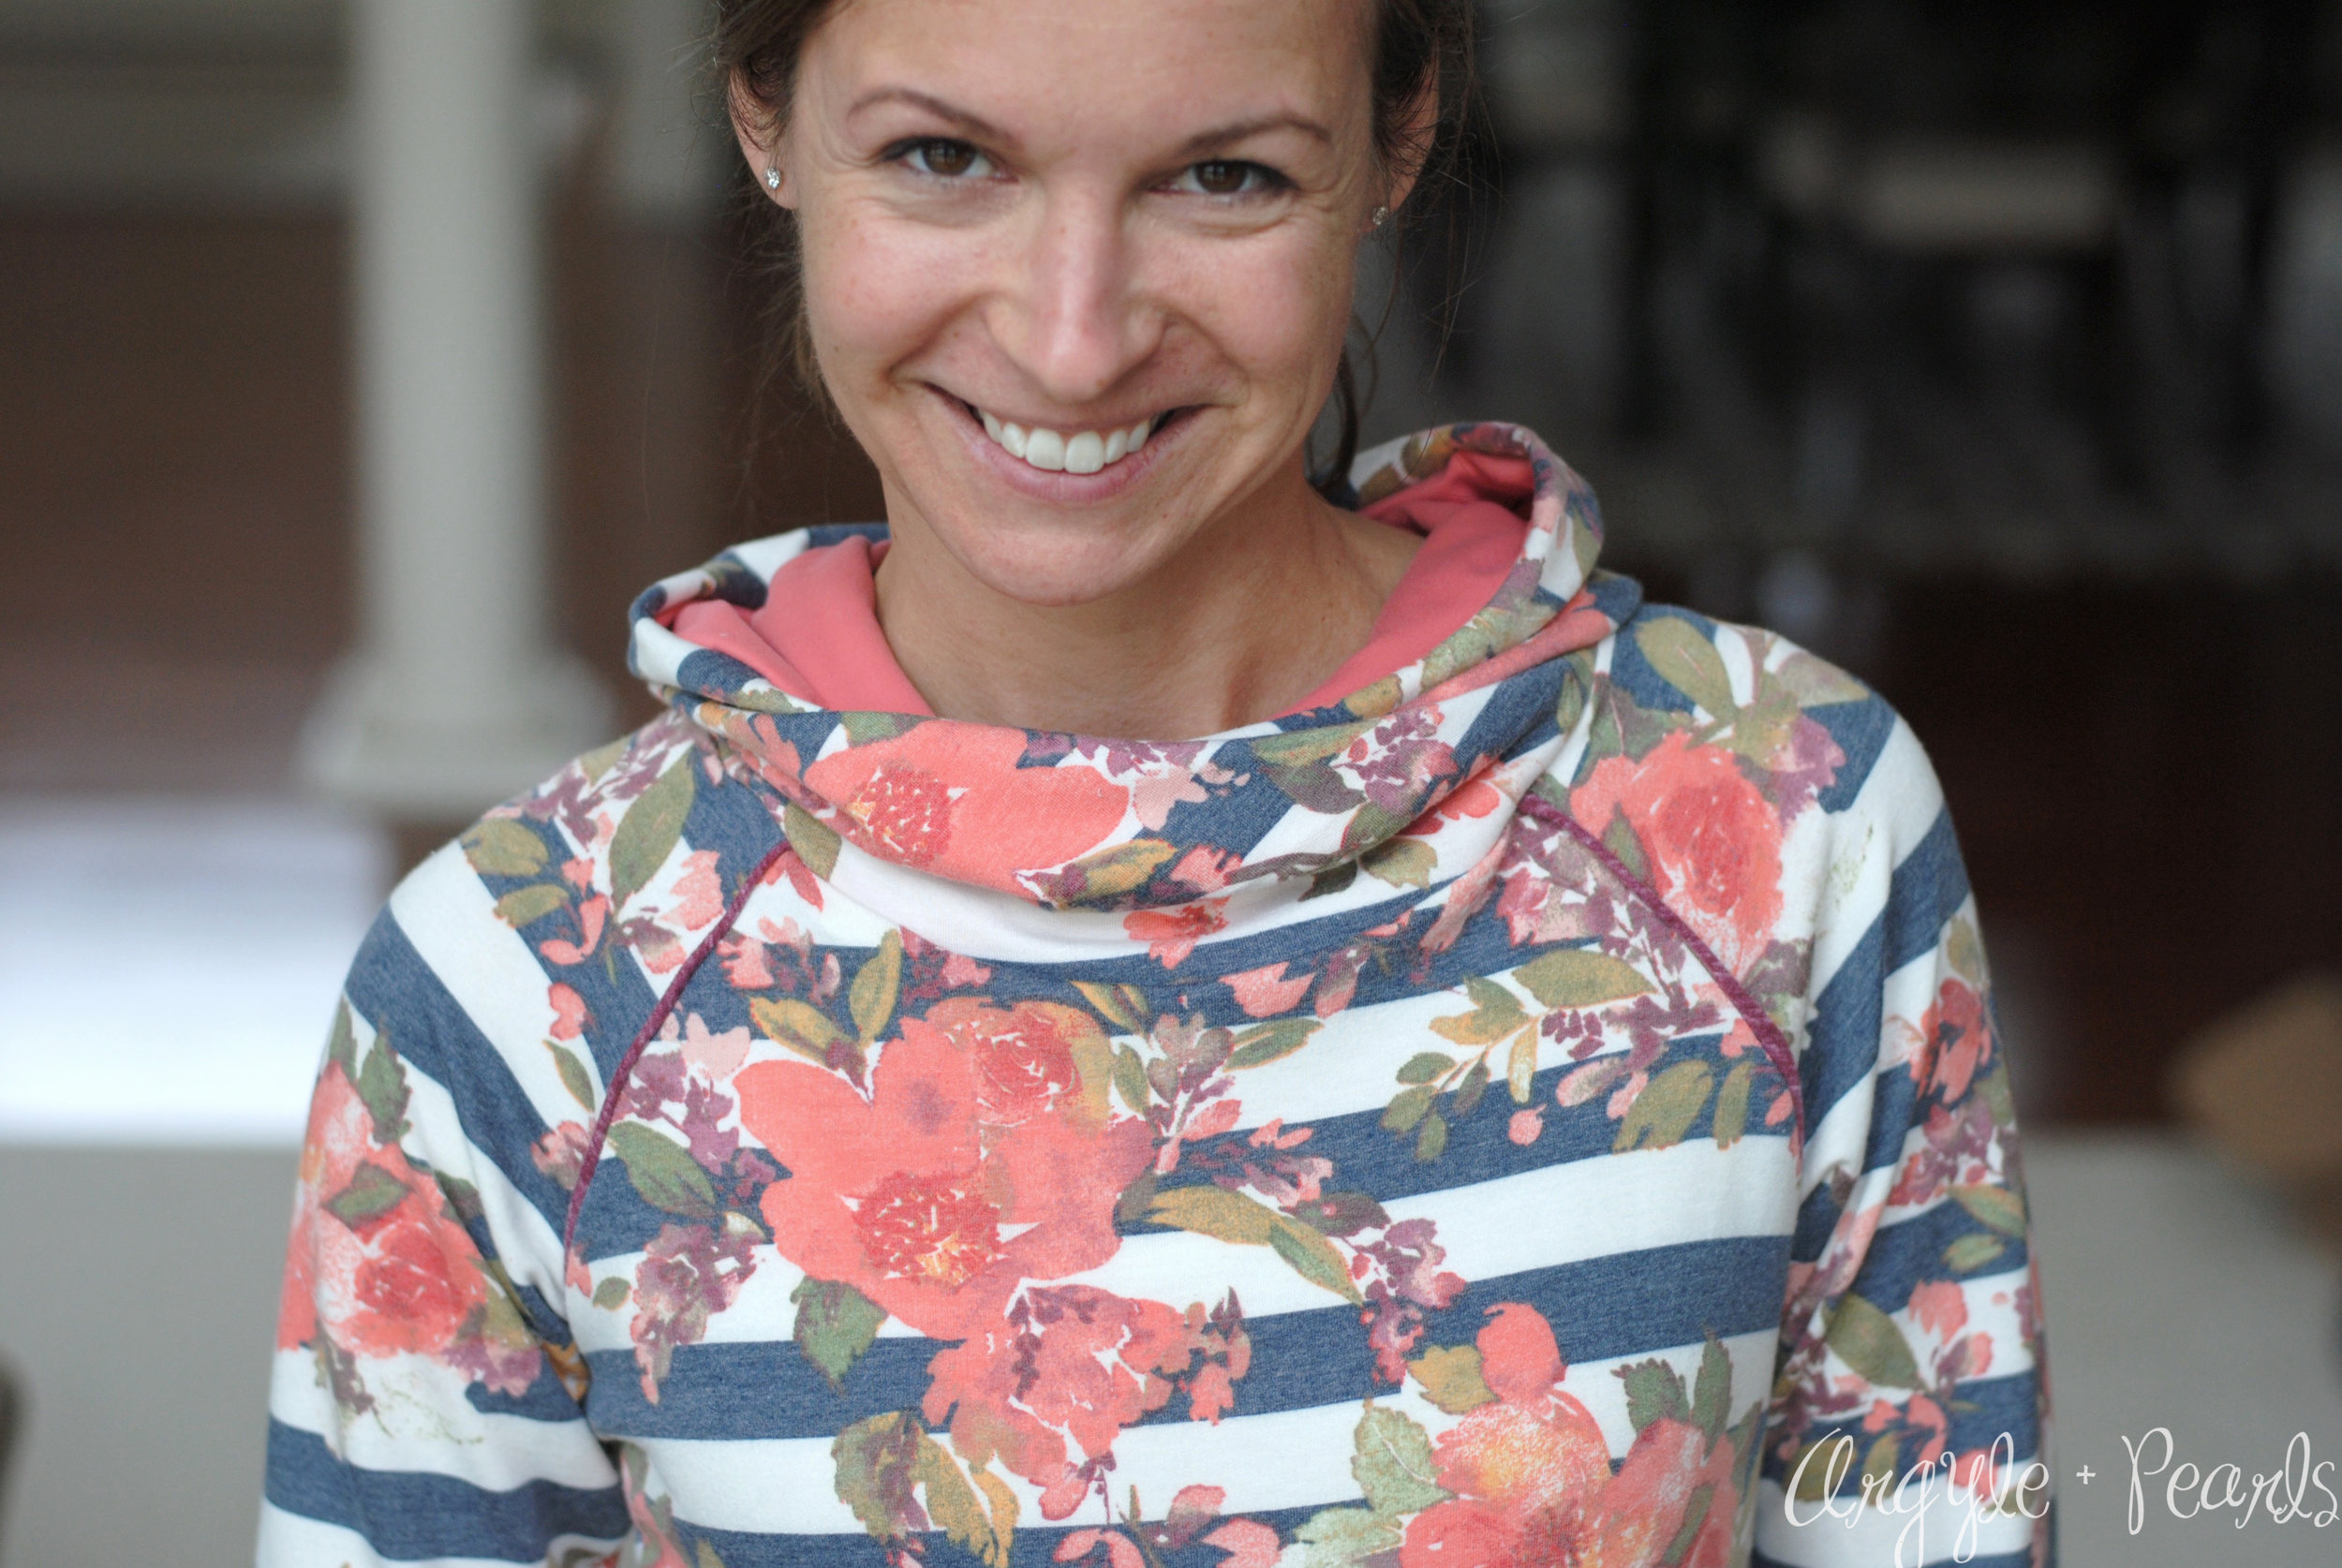
I chose two swim fabrics from Amelia Lane Designs, and decided to make a bikini top and rashguard from each one. The rashguards were very simple sews, and I just used basic tee patterns for those. The black/coral is the New Horizon’s New Orleans tee that I cropped, and the white/navy is the Made for Mermaids Lee Raglan that I also cropped and then added a wide bottom waistband to.

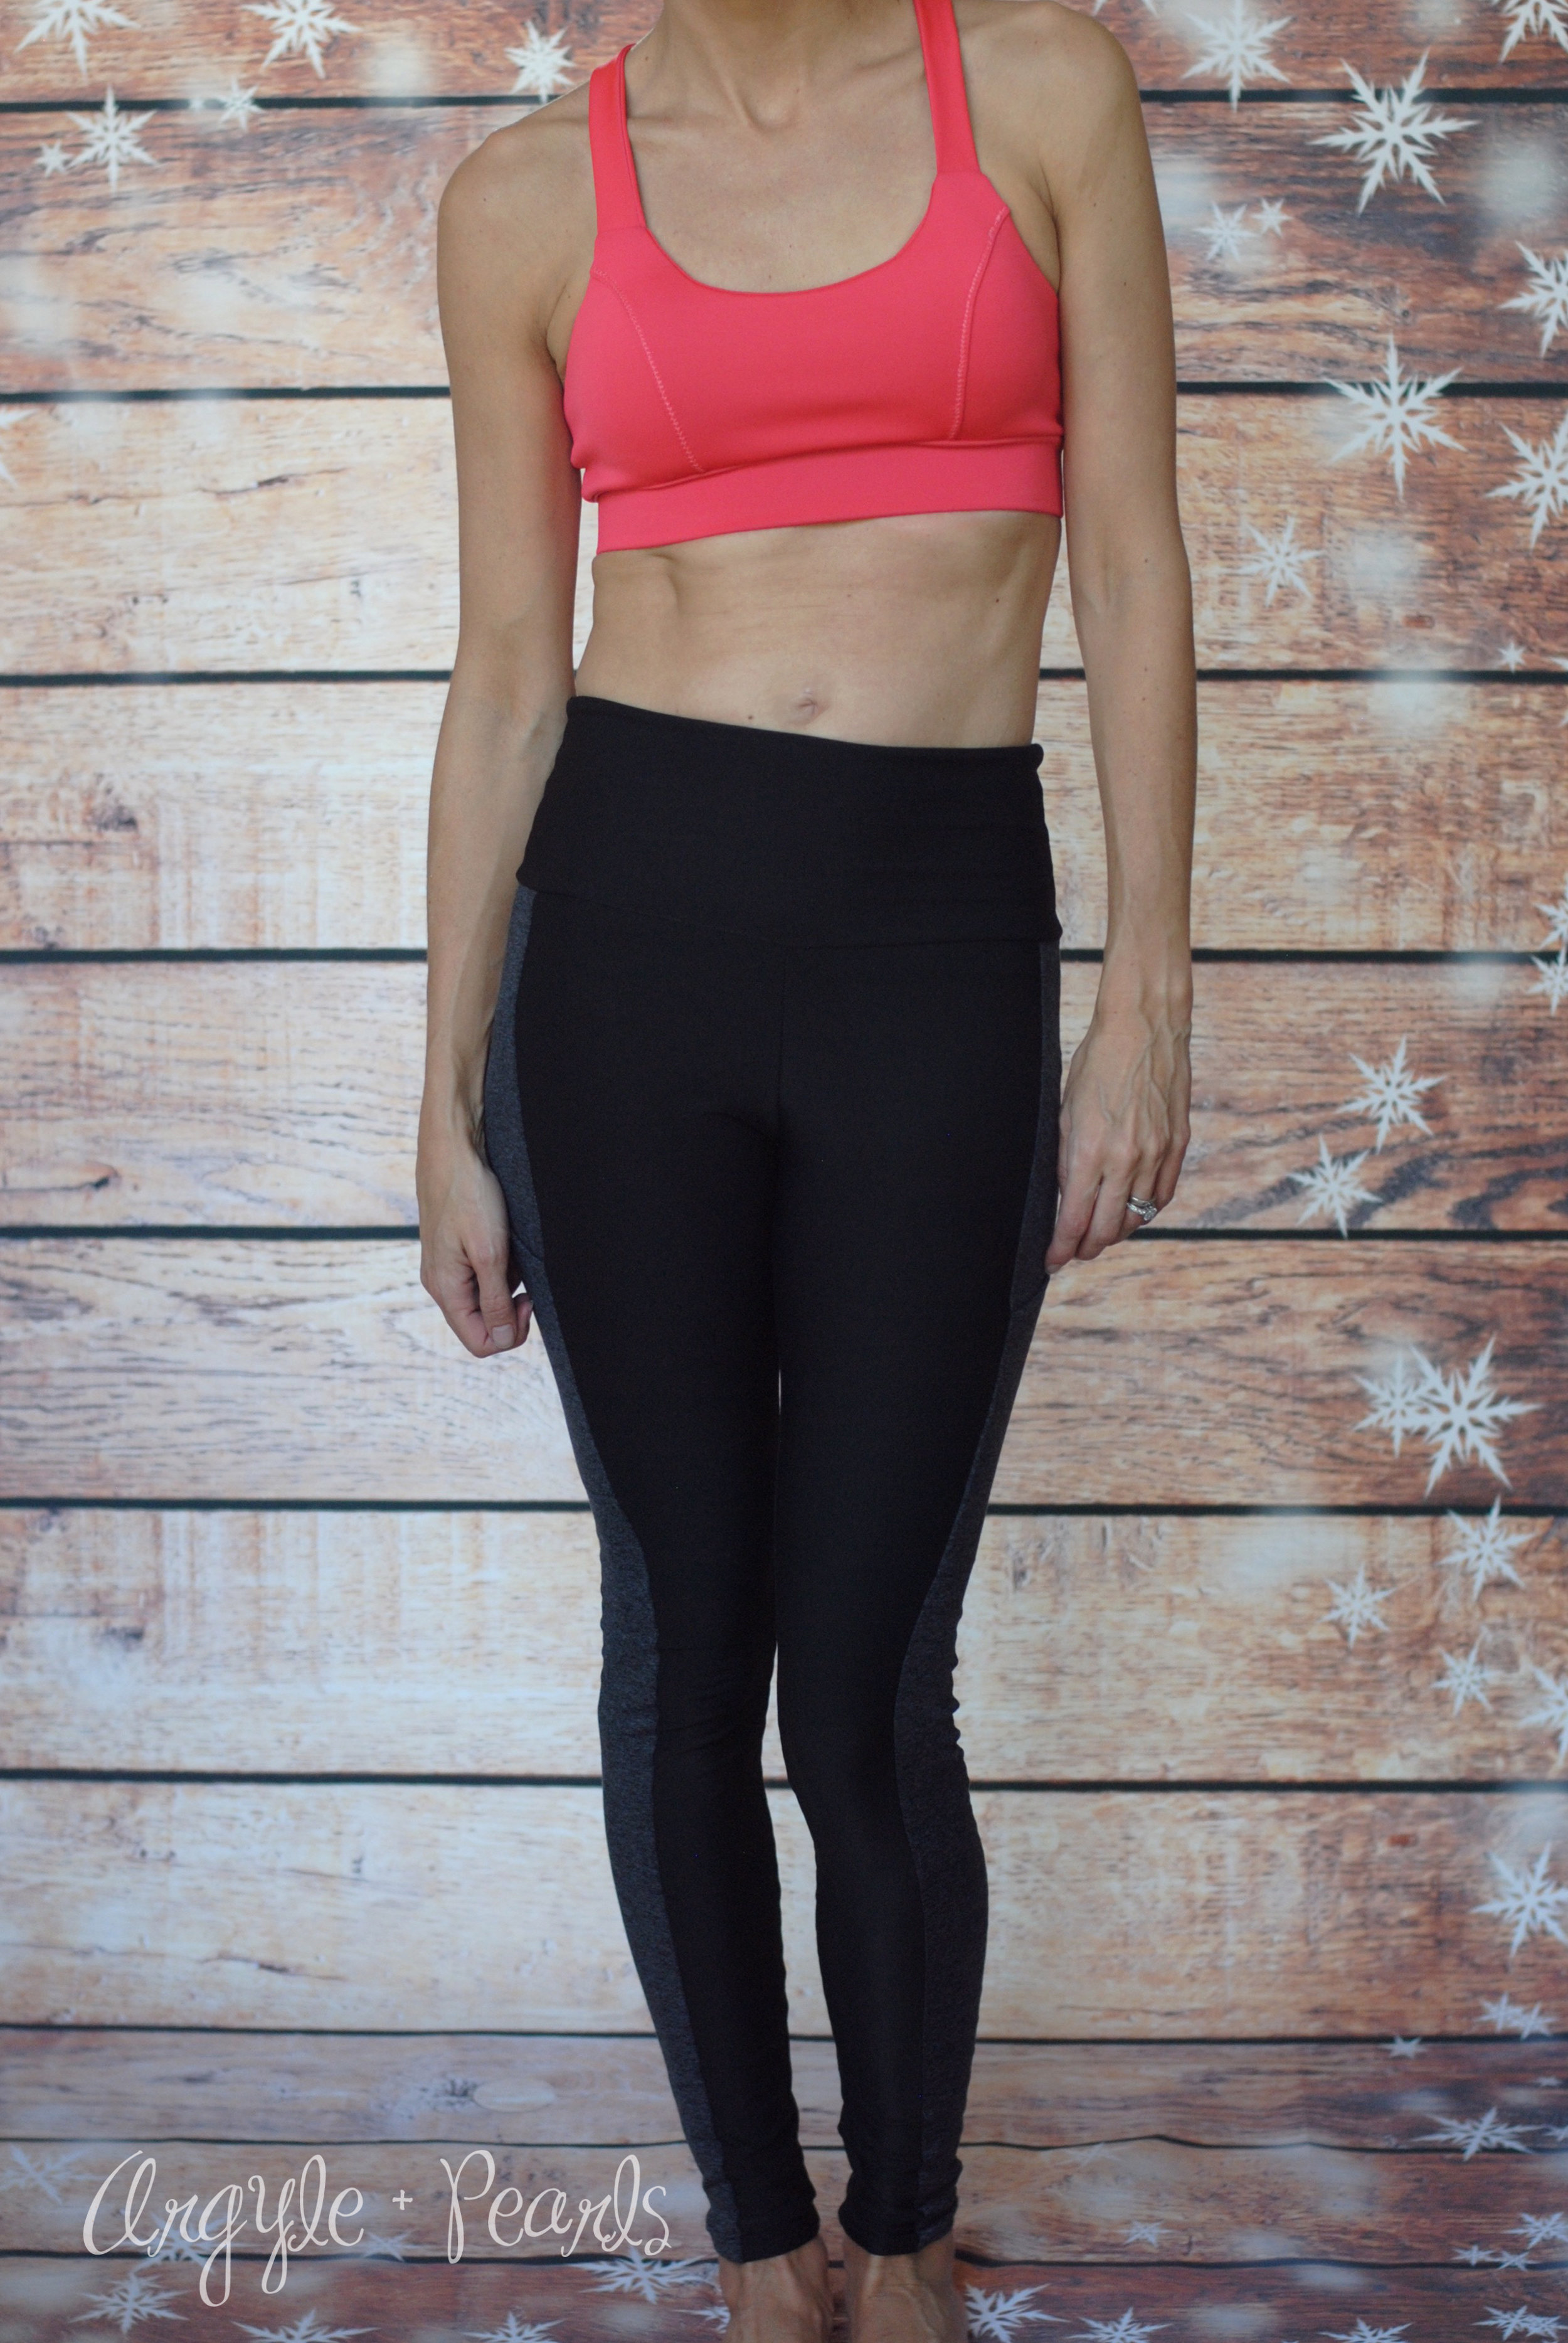
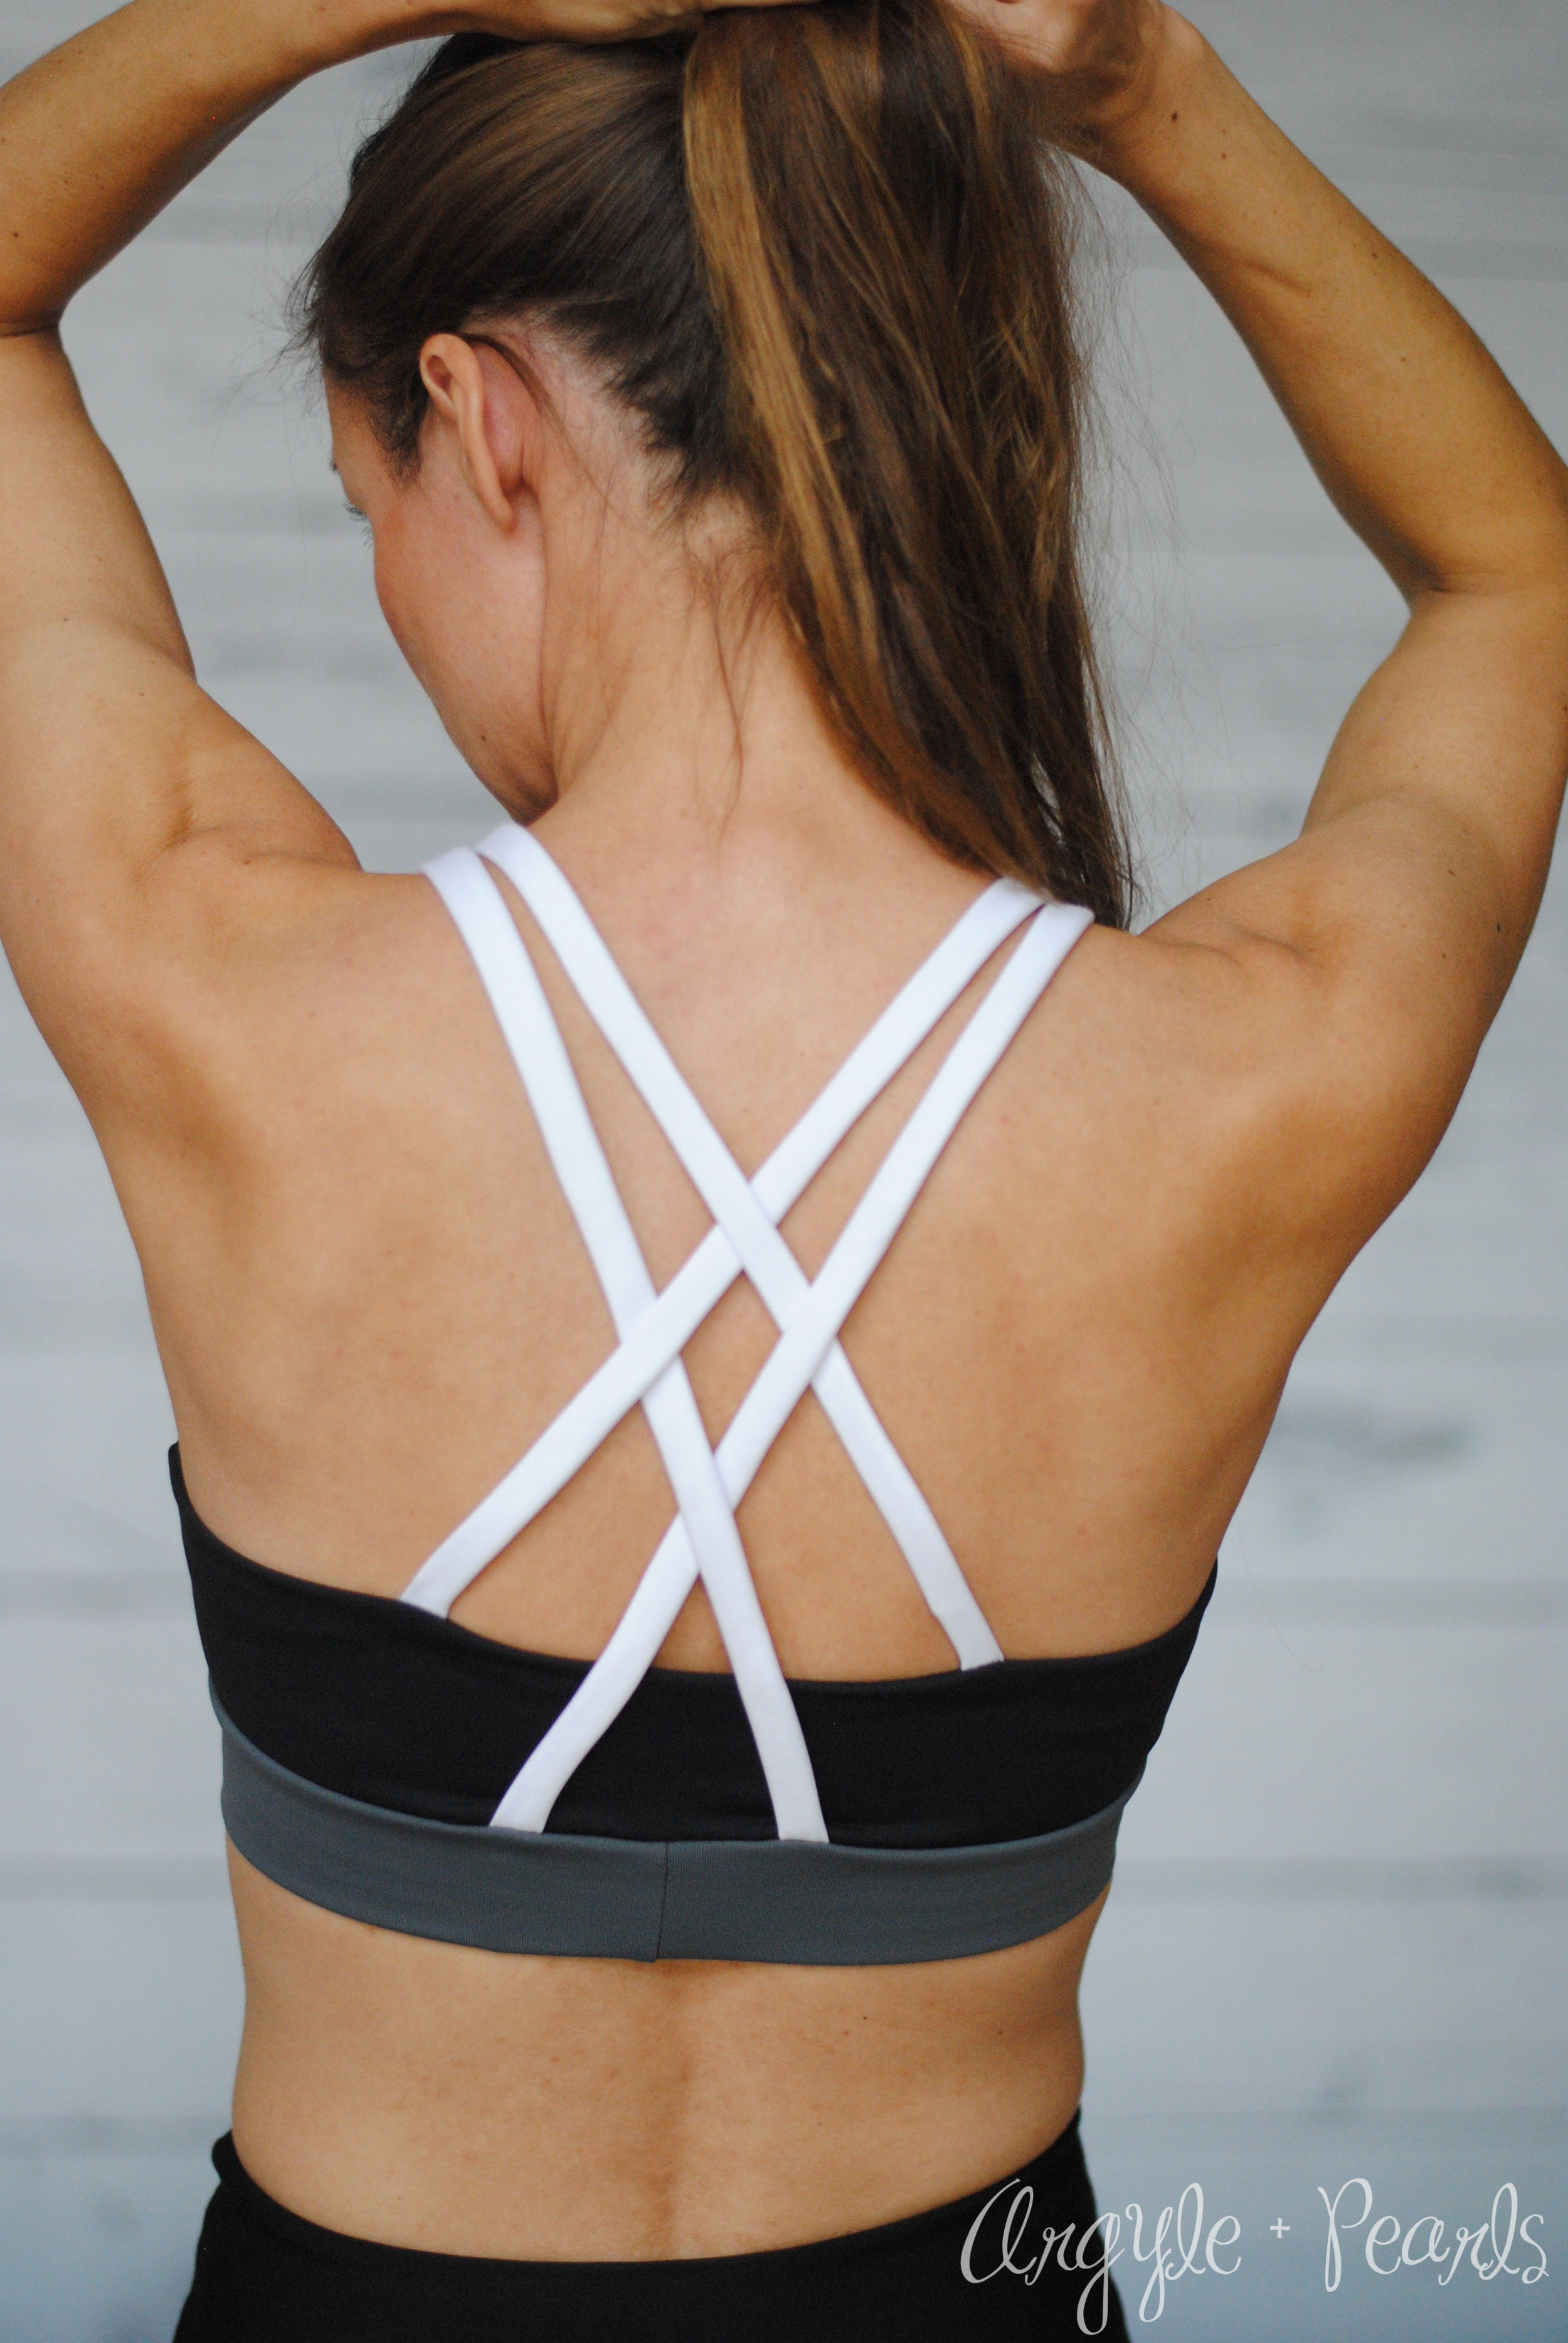
For the bikini tops, I wanted something comfortable with good coverage. For the Navy/White I chose to make a Greenstyle Creations North Shore bikini top. This pattern has so many options, but I decided to keep it simple as its mostly meant for wearing under the rashguard.

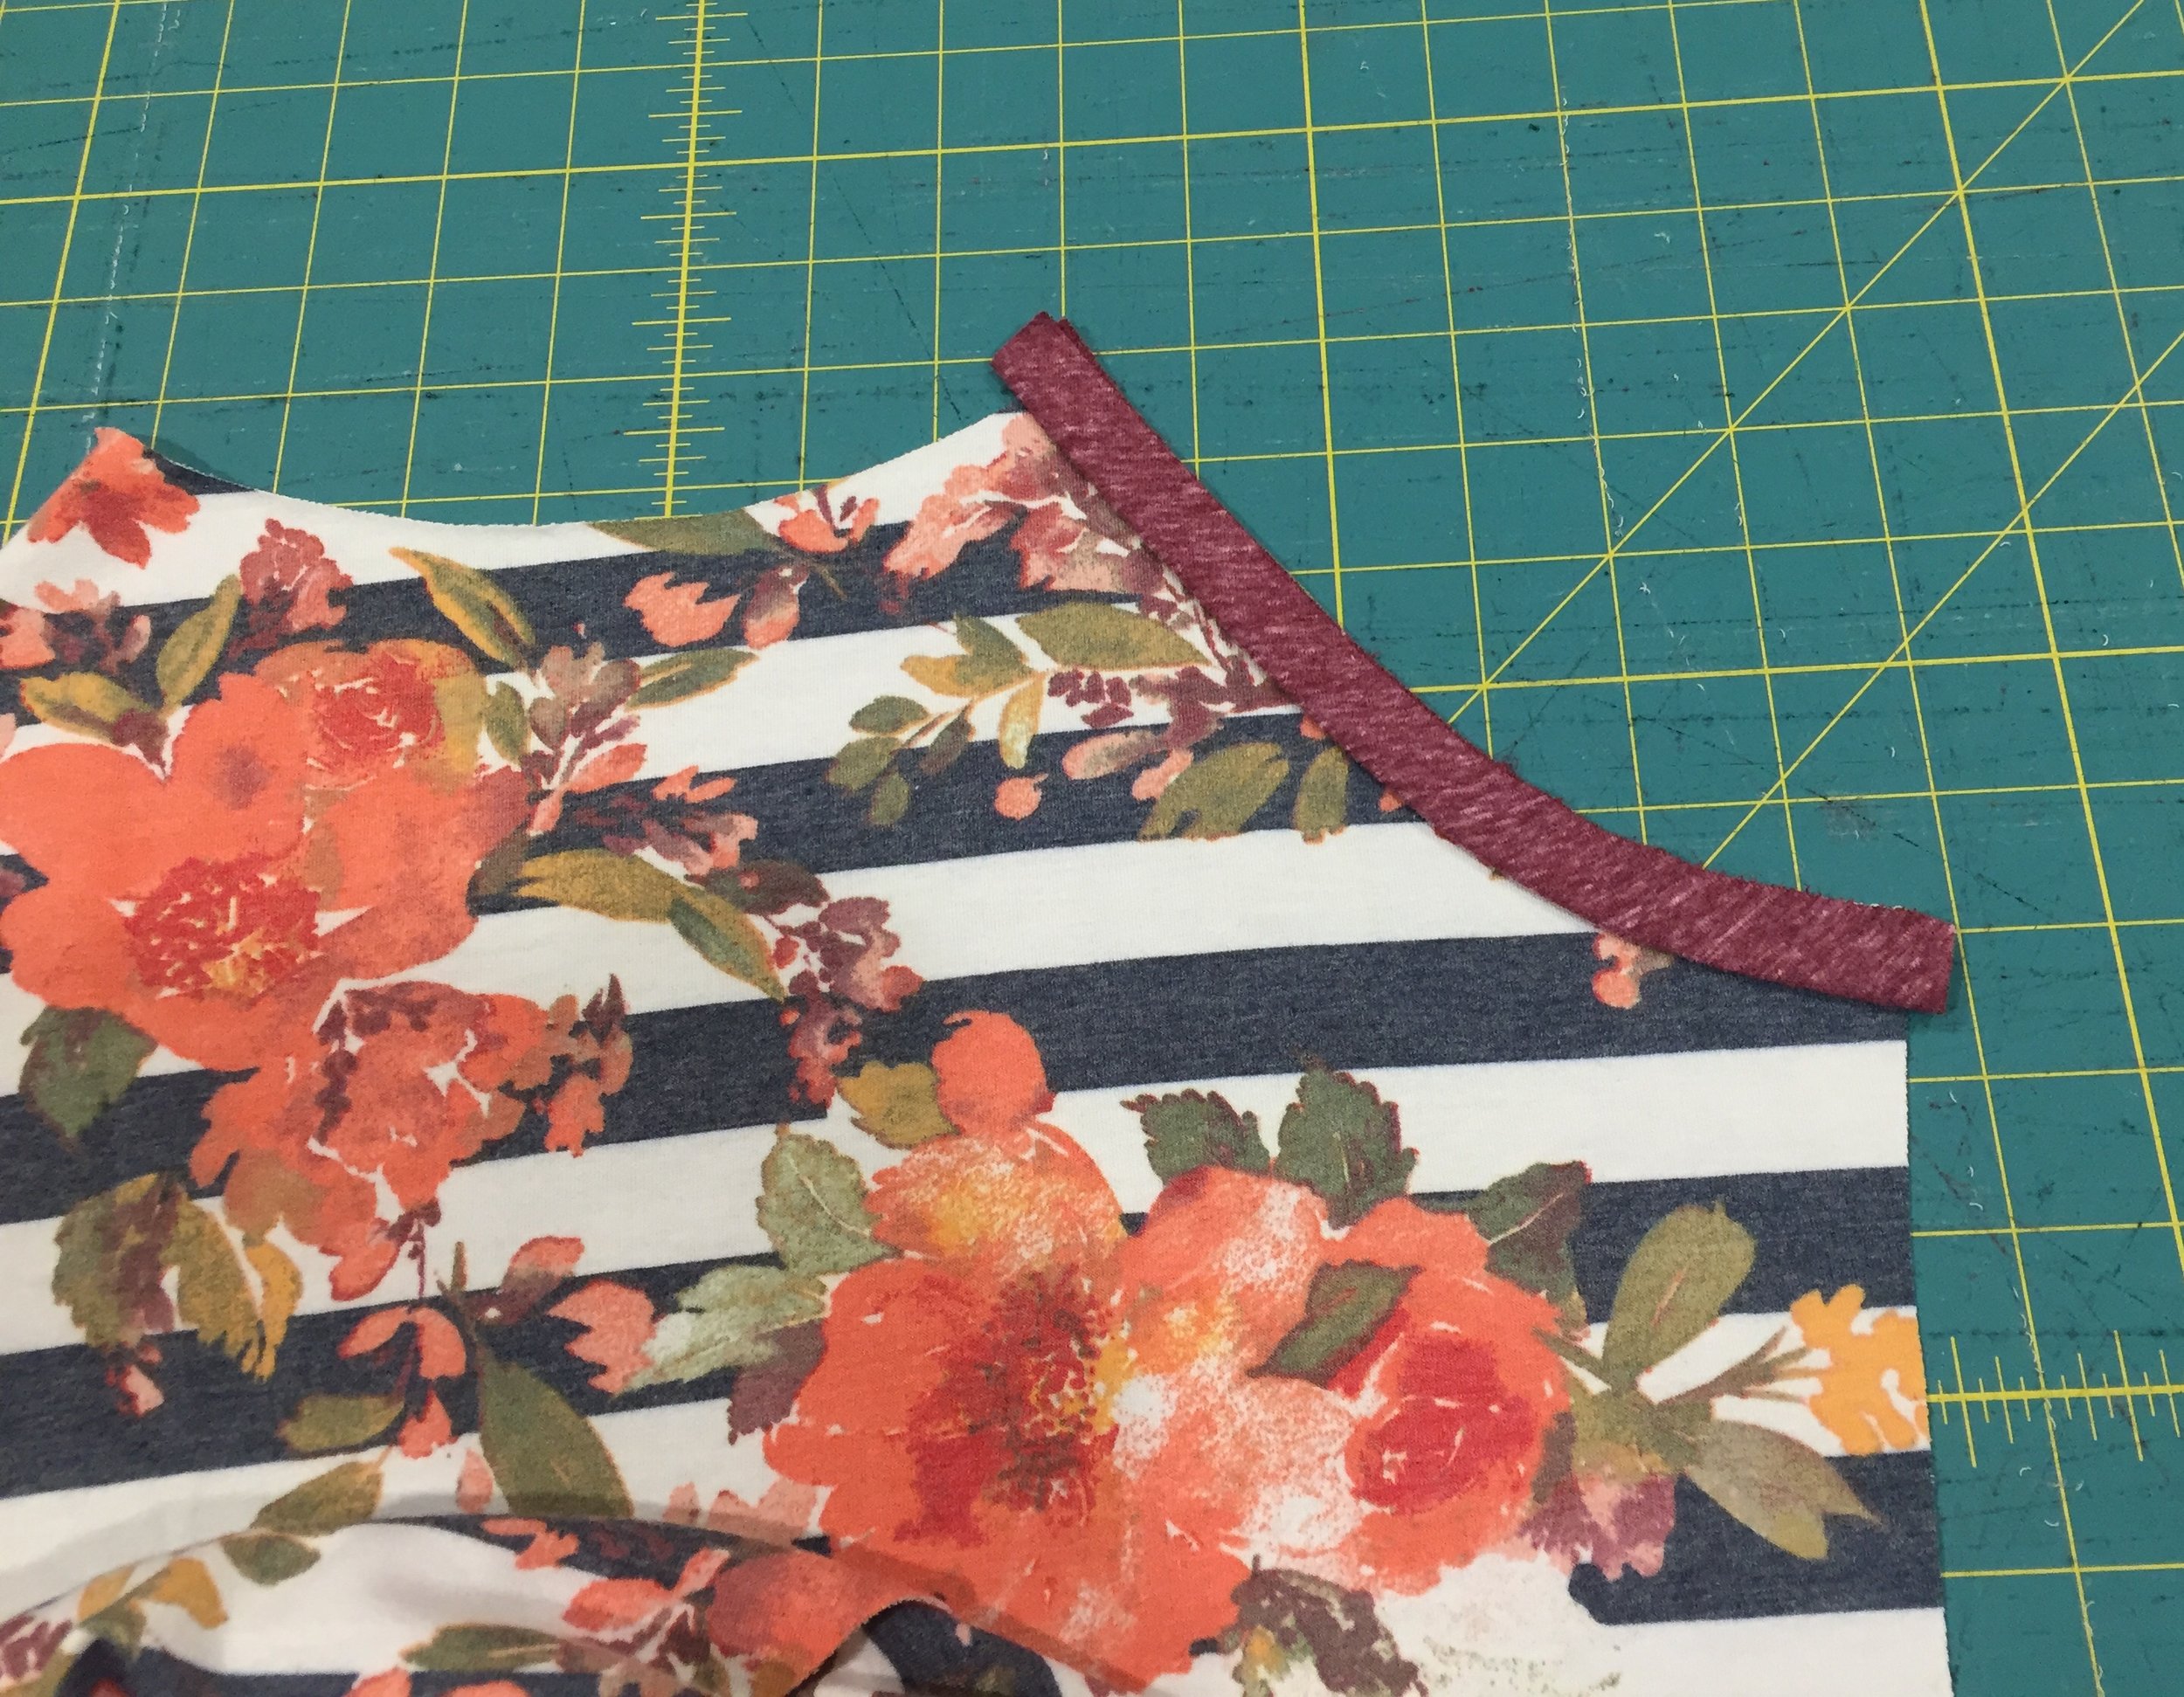
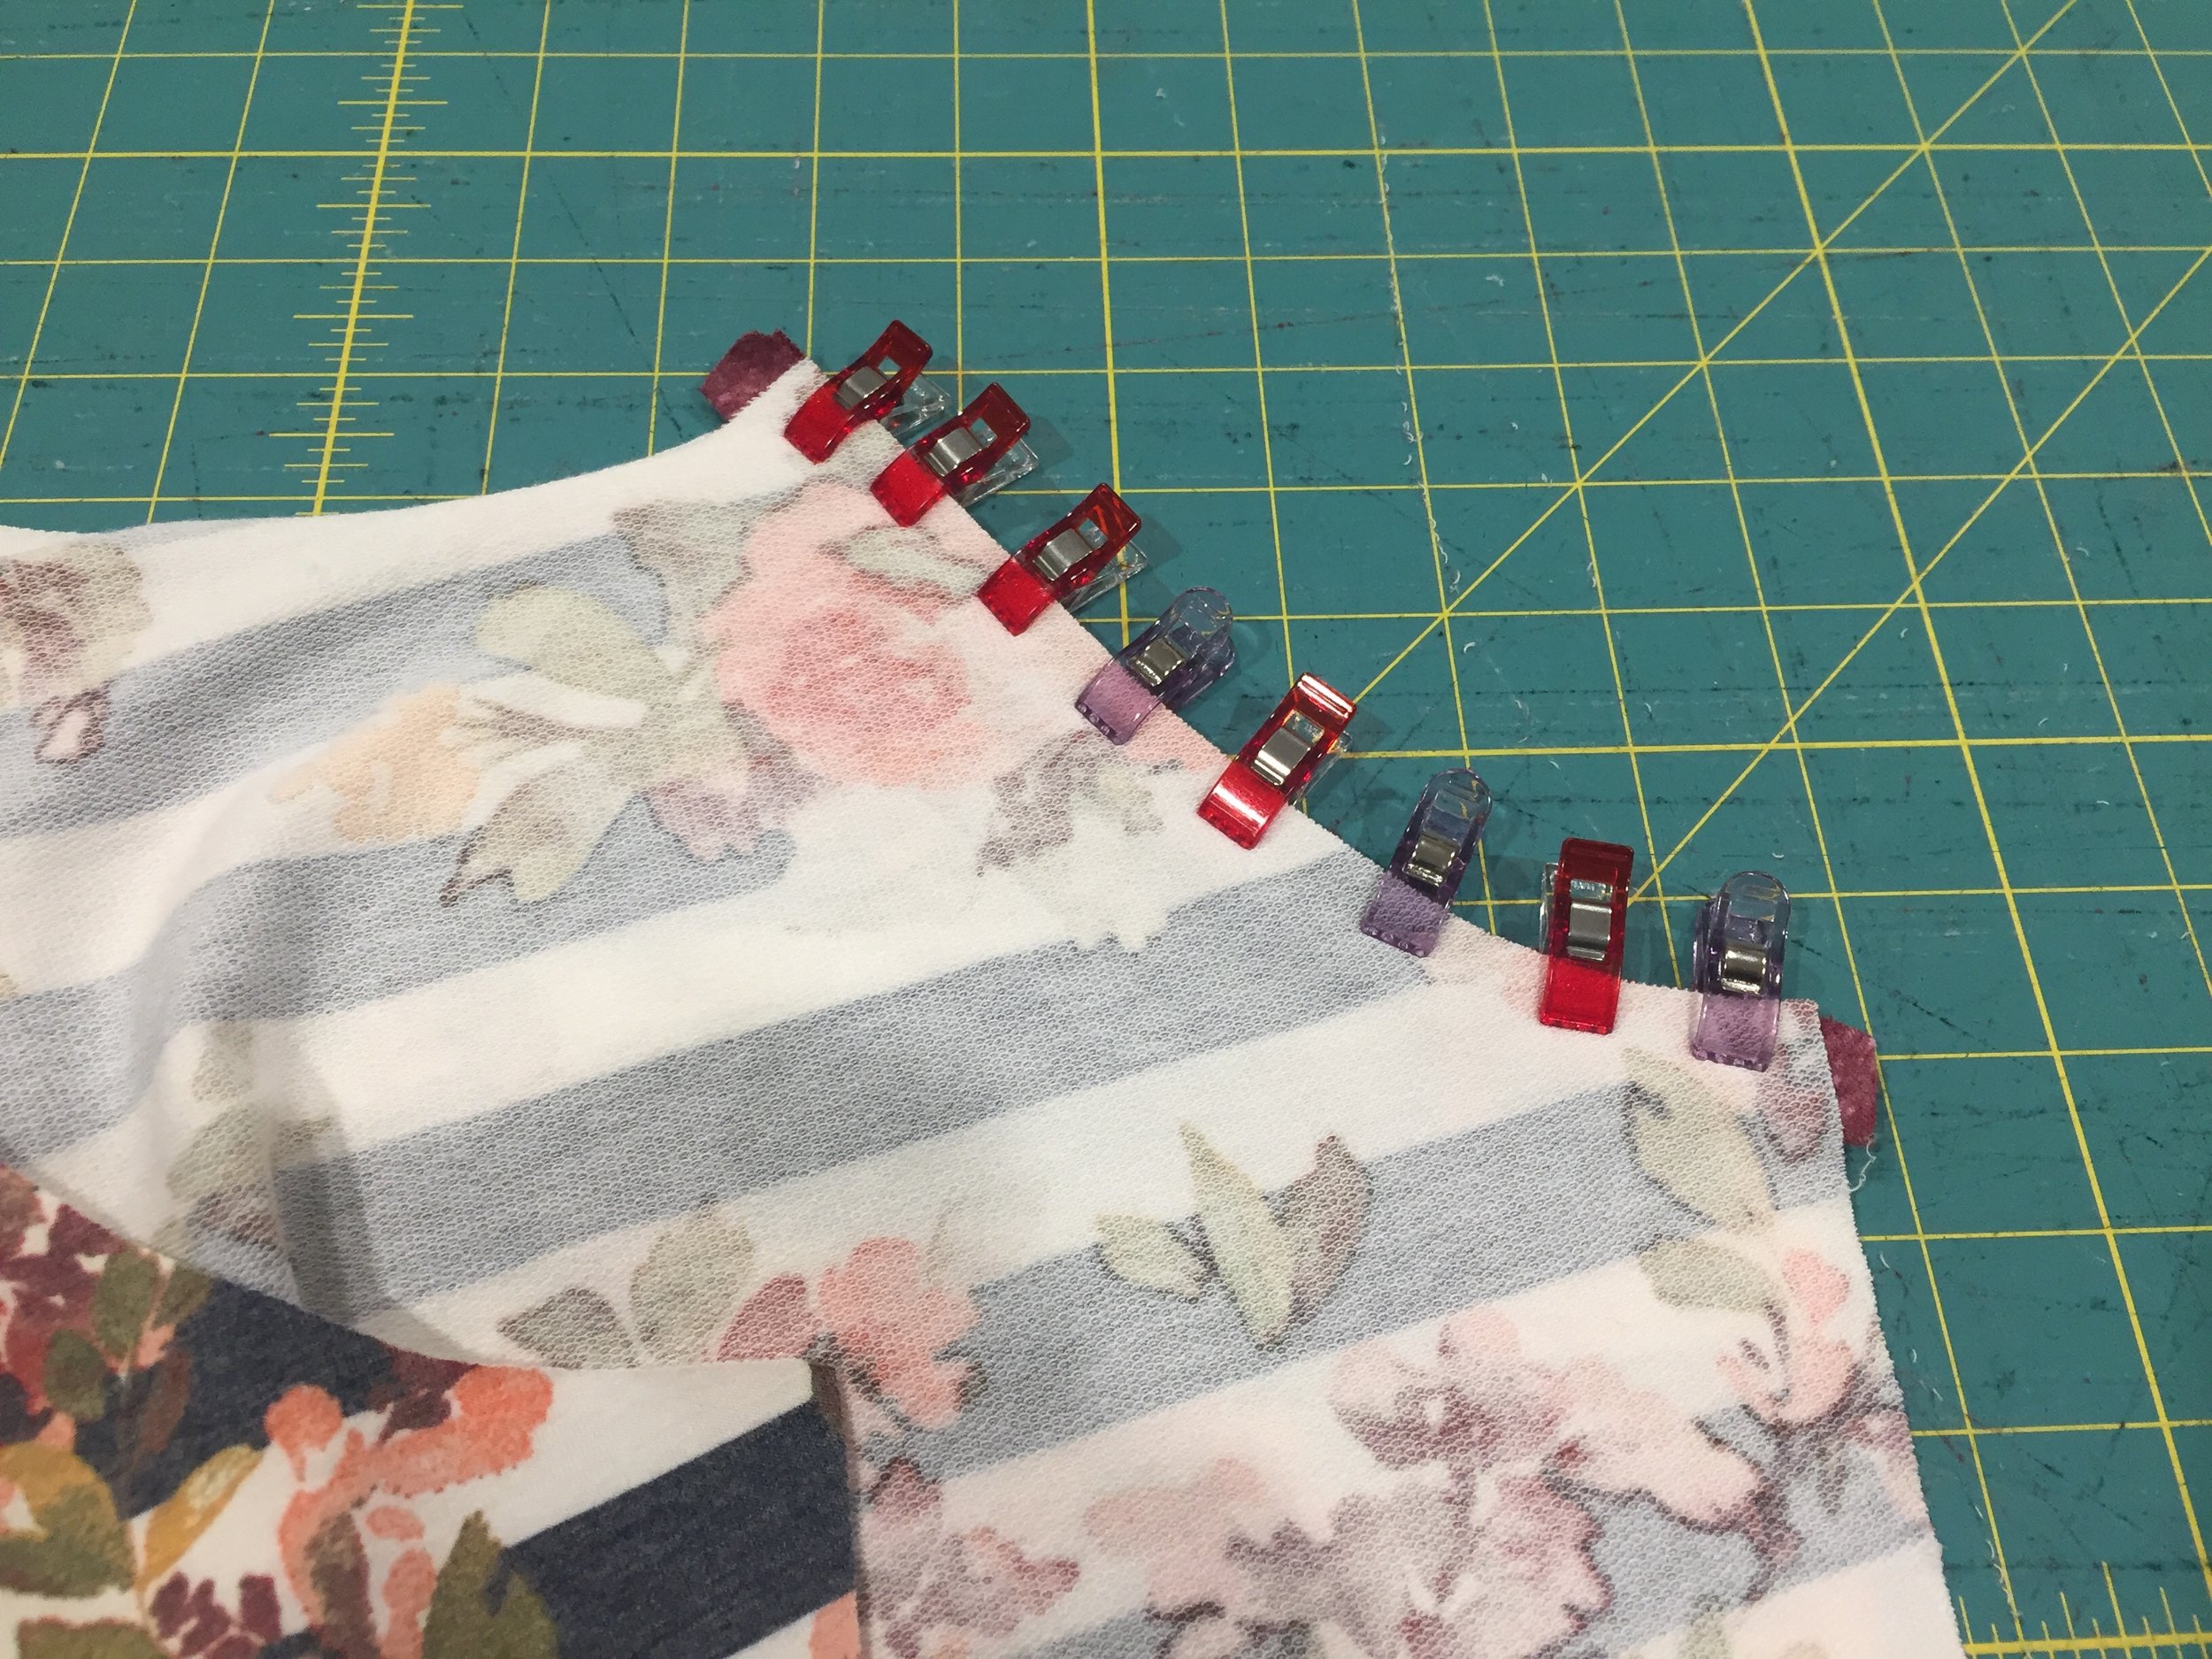
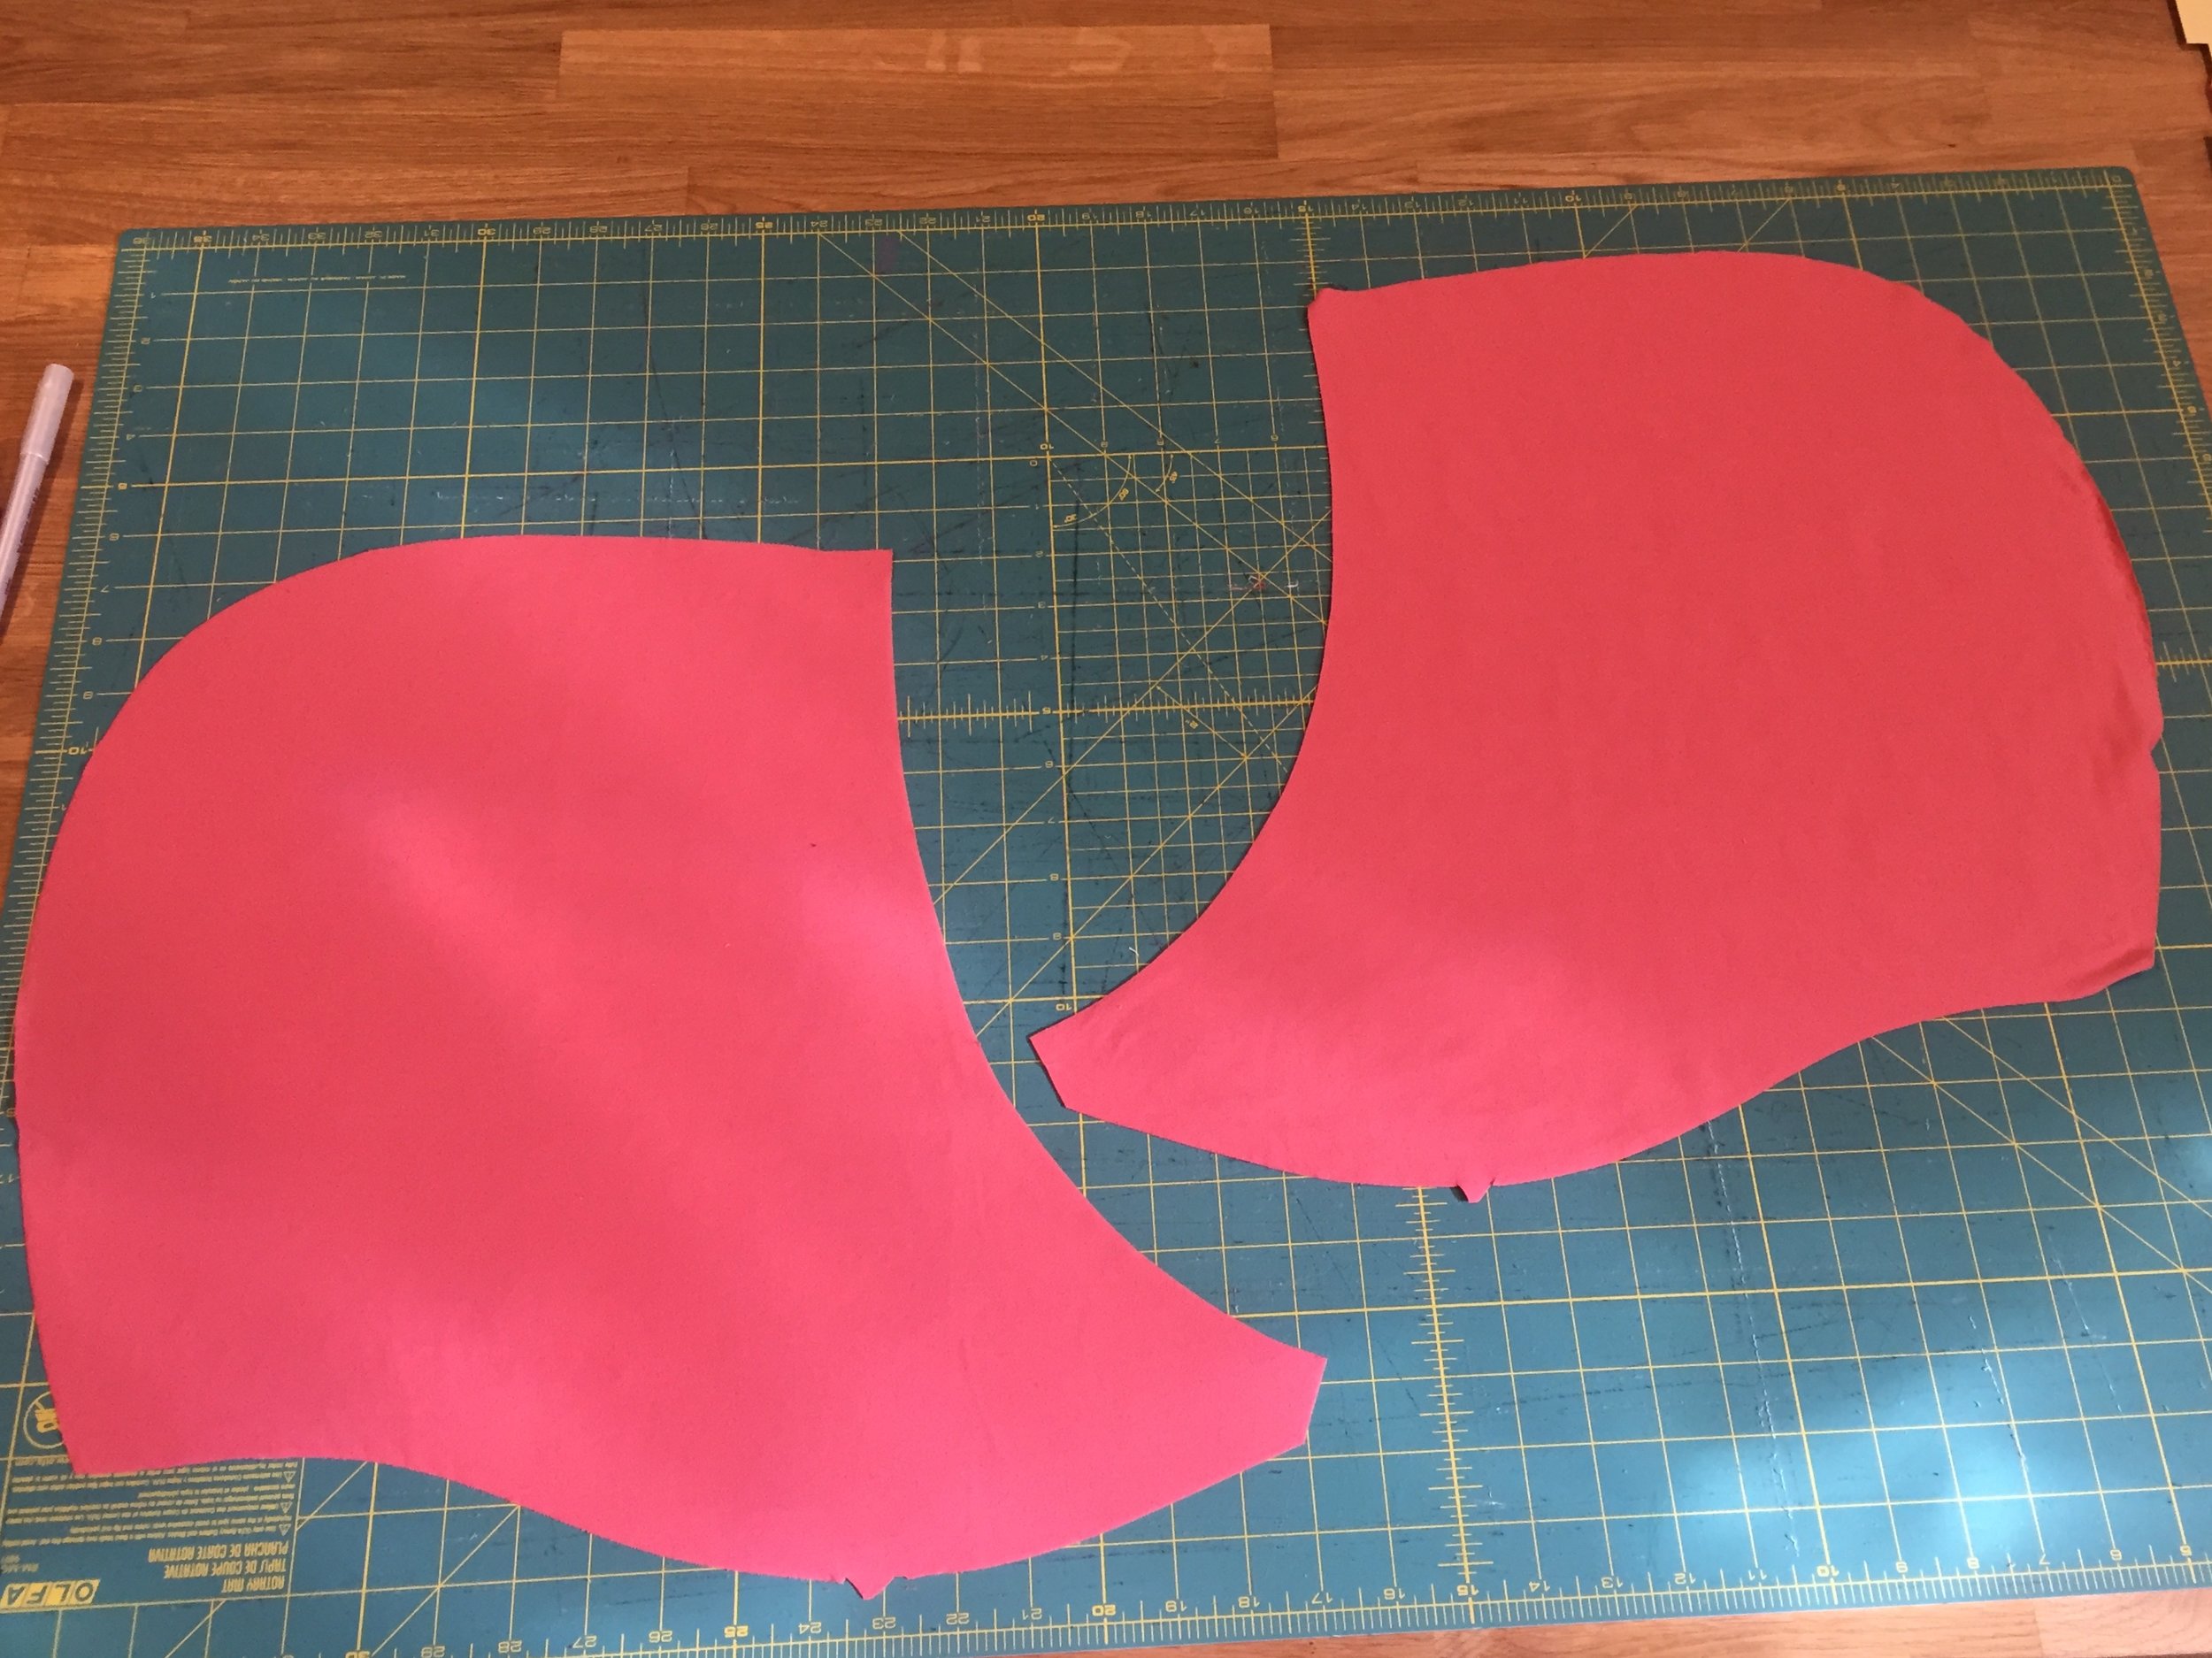
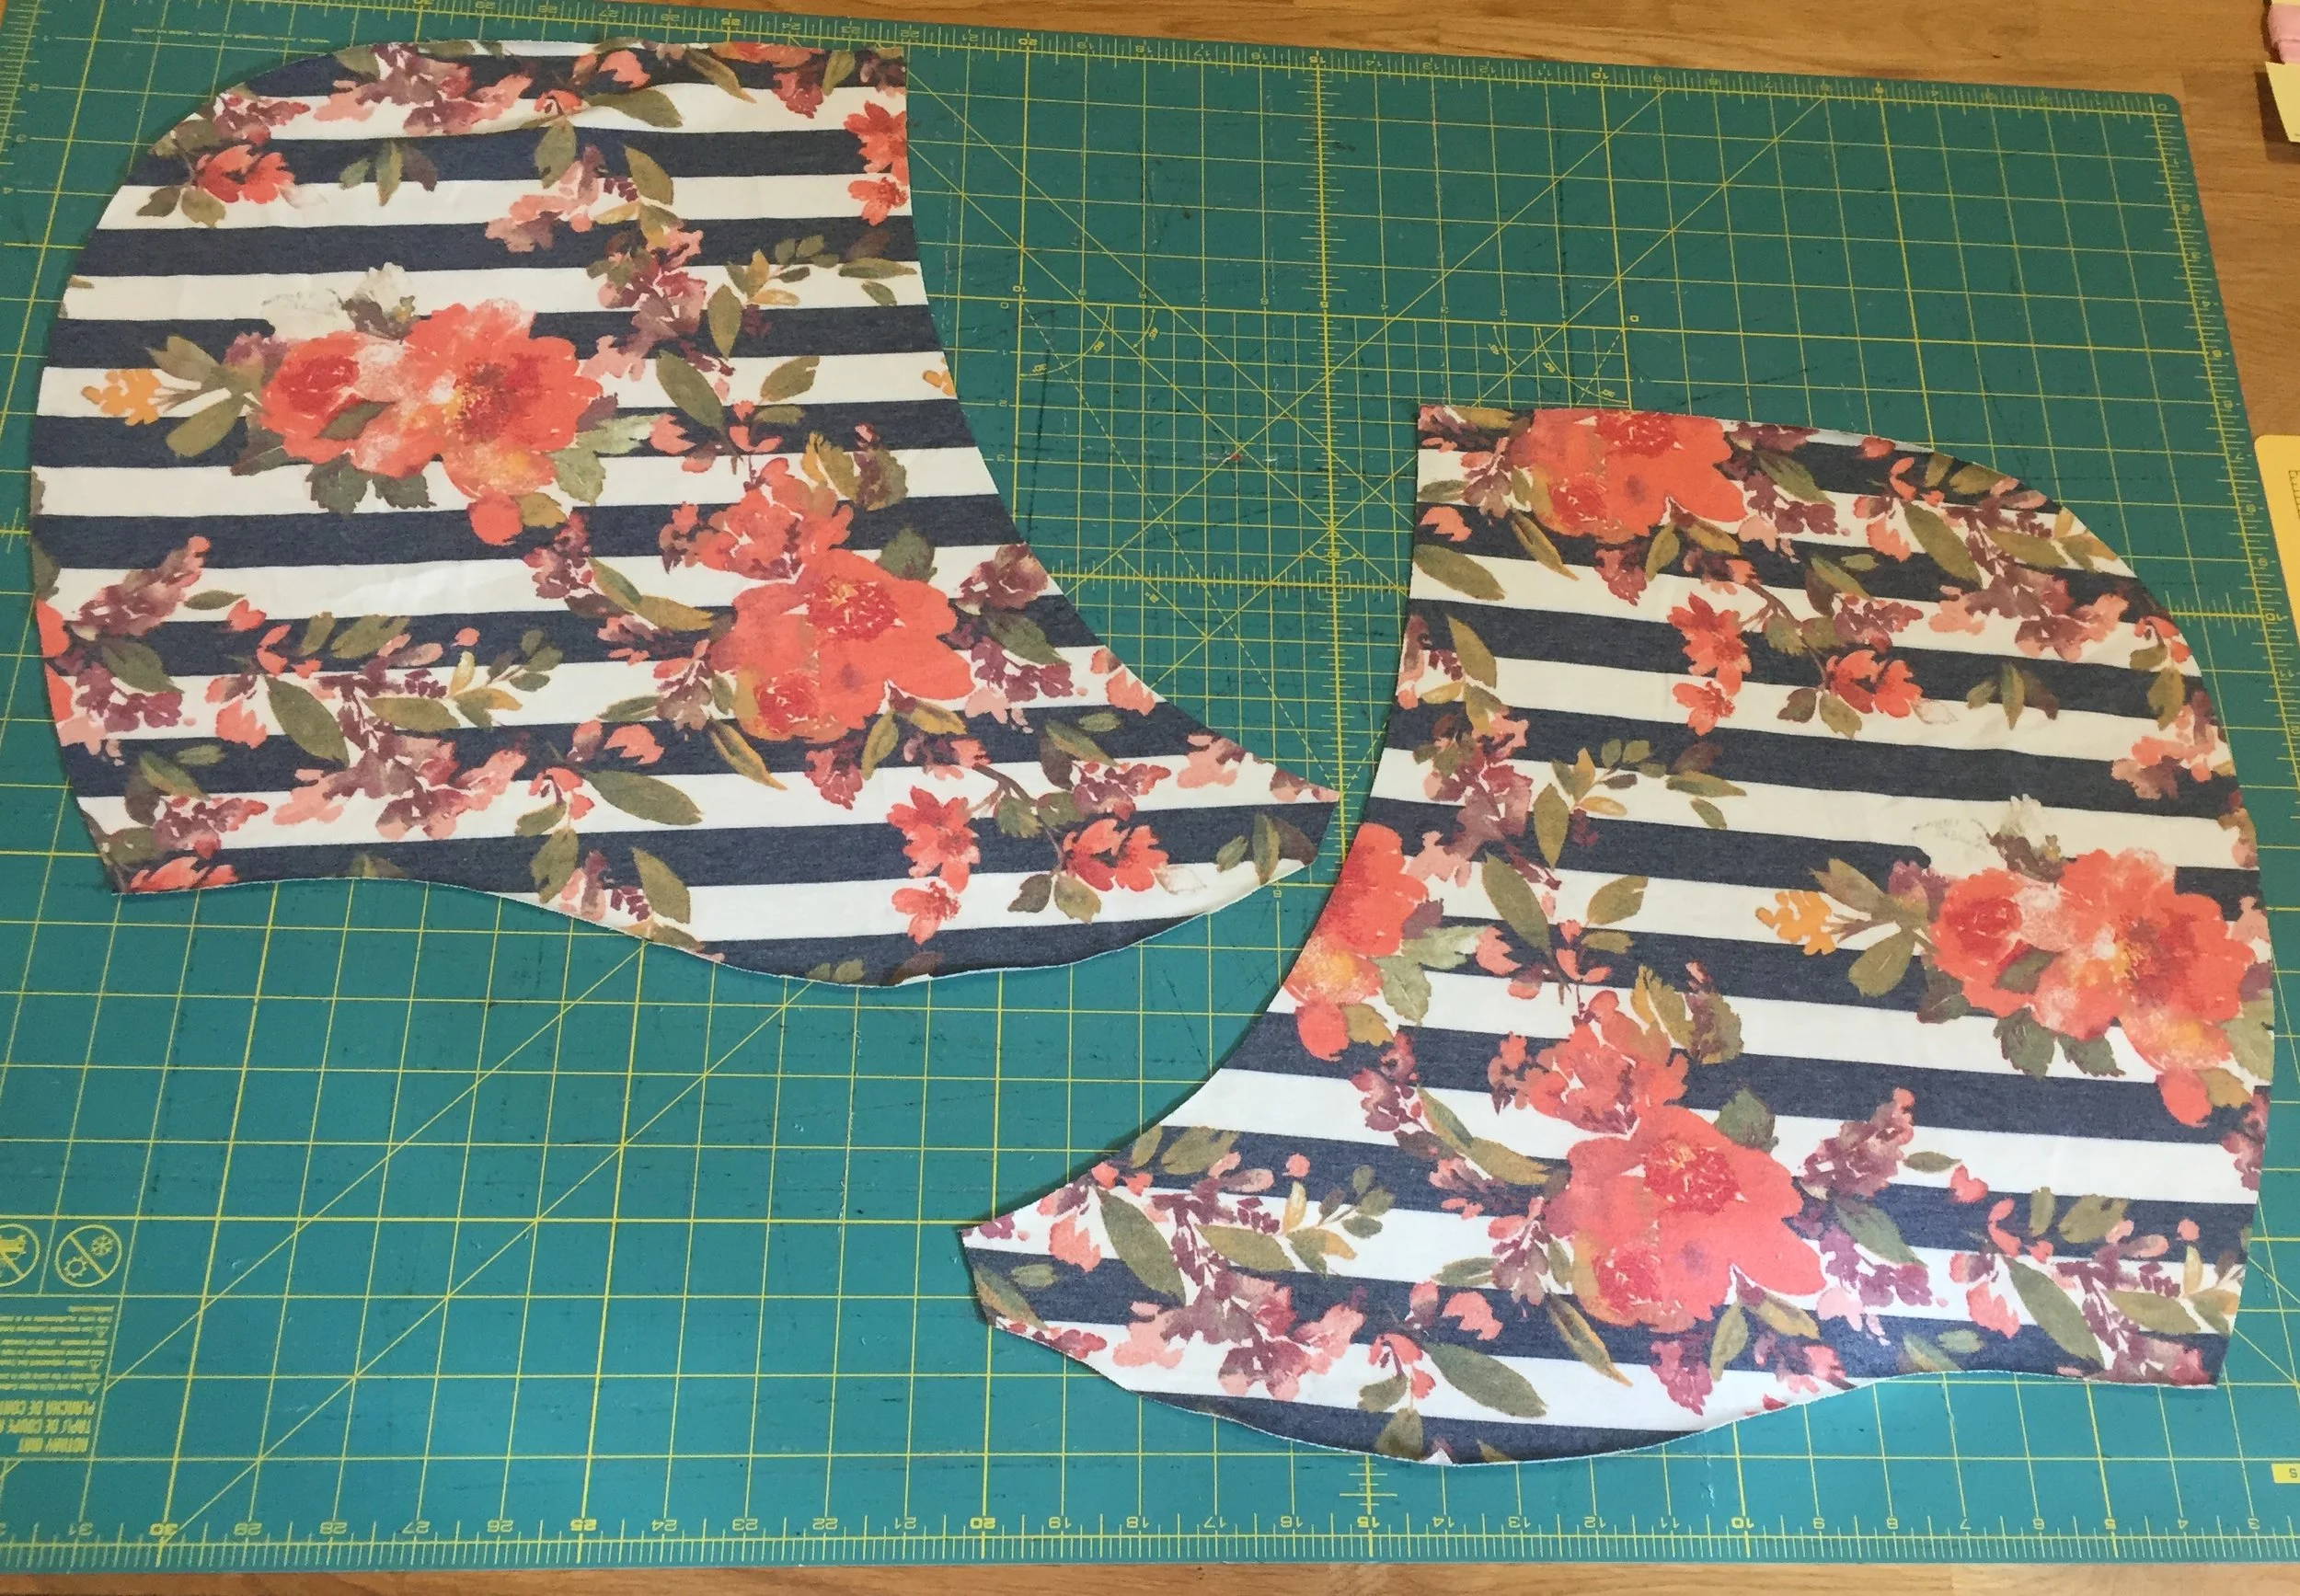
For the coral/black swim, I went rogue and hacked a tank top pattern into a swimsuit. I’m currently writing up a tutorial for that hack to be included on the New Horizon’s blog, so the steps I took for this modification I did to the Marbella tank will be found there eventually! I love the sporty look of this one!

Will you be sewing up any new swimwear for Spring and Summer? I’m sure these won’t be my only swimsuits I make this year, but I’m very pleased to have started with these sporty new pieces!

Please note that this post contains links.  Some of these may be "affiliate links" which means that if you decide to make a purchase I get paid a tiny portion of whatever is purchased, but it comes at no additional cost to you.  Affiliate payments go directly to my fabric fund to continue the cycle of sewing up or testing more patterns so I can share the love with you! Any opinions are solely my own.

Tanacross Cardigan from New Horizons Designs

First of all, how is it 2019!? The time continuum is definitely speeding up in my opinion.

We enjoyed a fantastic holiday break, but I am also more than ready for the kids to go back to school tomorrow. We do plan to enjoy one last fun today together today, but I’d be lying if I said I won’t be doing a little happy dance when they get on the bus tomorrow morning. :)

I haven’t done much sewing over the holidays as I was in such a rush as usual before Christmas, that I got a little over-stressed and also destroyed my sewing room in the process. Happens every year, even though I try to tell myself not to take on too much right before Christmas. Some day I’ll listen to myself…. I really need to take the time to put everything back in its place and organize and de-clutter before I can start to feel calm and focused in there again. I was able to squeeze in one little project over the weekend, as I needed a little creative outlet despite the mess. I made my beauty a cute long cardigan for going back to school this week! This is the Tanacross Cardigan from New Horizons Designs.

This is definitely a new style for her, but she is ROCKING it! I originally planned to not include and trim detail, but then I remembered I had this gorgeous burgundy fringe somewhere in my stash and once I uncovered it in my mess I realized it was a perfect match and I HAD to use it. I had gotten this fringe from Sincerely Rylee many many many years ago and have only used a little bit of it. I have already pulled out a solid burgundy sweater knit for myself because I love how this came together and decided I most definitely need a burgundy long sweater with fringe myself.

I bought this floral from So Sew English as part of a bundle with a green sweater knit. I actually had only wanted the green sweater knit and thought I’d either sell this floral or use it for practice, but when I received it, I actually liked it way better than the green sweater knit I thought I wanted! Its funny how frequently that happens! I opted for snaps on the cardigan as I thought that would be easier for a 5 year old to do and undo herself. After watching her take the snapped cardigan off OVER HER HEAD, I decided it really didn’t matter which closure I chose as she would find her own way of doing things…. as she usually does!

Here’s to a healthy and prosperous New Year to you all. I’m hoping to spend more time on the blog sharing more than just sewing this year. Can’t wait to see where this adventure goes!

Please note that this post contains links.  Some of these may be "affiliate links" which means that if you decide to make a purchase I get paid a tiny portion of whatever is purchased, but at no additional cost to you.  Affiliate payments go directly to my fabric fund to continue the cycle of sewing up or testing more patterns so I can share the love with you!

Greenstyle Power Sports Bra

Can I just start by saying that I often feel as if sewing is pretty much magic? For example, on Monday I started with 1 yard of fabric, some elastic, thread and my sewing machines, and a couple hours later, I had a perfectly fitting, stylish sports bra and matching pair of workout leggings (which I bet some of you non-sewists thought were from Athleta, am I right?) MAGIC I tell ya!

Part of the magic of sewing and creating these pieces is having awesome patterns to follow. The new Power Sports Bra from GreenStyle Creations is one of those awesome patterns! It has several different style options to choose from, of which I’ve already made two! I have already sewn 2 of the strappy crossback versions, and one of the racerback options. And if a pocket is an option on a pattern, you know I’m making it, so my racerback bra has a pocket for my phone! I also had to make some matching leggings and a top for my my new sports bras to complete my outfits… so in addition to the three sports bras I just mentioned, I also made two pairs of Stride Tights and an Open Back Pullover to mix and match. Phew, that was a lot of sewing, but it all came together surprisingly quick…. and now I have several new workout outfits. (Or wear-to-Target-and-pretend-I’ll-workout later-outfits…)

Now, lets talk about the fabrics I used for everything. Most of my fabric used here was from So Sew English that I have been holding onto for these exact pieces and some is from Joann Fabrics. The black/white/gray sports bra is all compression fabric from the Loungeletic line at Joanns. The emerald green sports bra and matching leggings were made from brushed performance fabric, the black and grey leggings were also made from some brushed yoga and heavy brushed performance, the coral sports bra was made from a reversible performance fabric, and the open back pullover is a lightweight french terry all of which are from So Sew English.

Please note that this post contains links.  Some of these may be "affiliate links" which means that if you decide to make a purchase I get paid a tiny portion of whatever is purchased, but at no additional cost to you.  Affiliate payments go directly to my fabric fund to continue the cycle of sewing up or testing more patterns so I can share the love with you!

Made for Mermaids Hudson Sweatshirt with a Side Panel Pocket hack

While I was helping out with the testing of the new Hudson patterns from Made for Mermaids, I made a total of 8 sweatshirts for my family. (we all got 2 each!) As I was making the last few, I came up with a hack I just had to try out, and gave it a go on my daughter’s second sweatshirt. I decided I really wanted to be able to construct the entire sweatshirt on my serger, and by adding the pockets to the front side panels and finishing the edge with a band, I was able to do just that! Score!

I’ve illustrated my steps below on doing this hack. You will begin by cutting out all of your pieces according to the pattern, except for the pocket pieces. Do not cut the two pocket pieces from the pattern. Instead, create you own pocket pattern pieces using the side panels. You can determine the depth and angle of your pockets based on your own preference. I have the women’s shown below. I thought the top point of the pocket would look most flattering angling down from the narrowest part of the curve, as shown in the first picture. Draw your preferred pocket line on your side panel piece, and trace this outline to become your pocket pattern piece. (or just fold the pattern on the line you drew and use that as your piece as I tend to do). You will now cut 2 pocket pieces (mirror images!) using this newly created pattern piece. Next you will need to create a band for the top of the pocket opening. My pockets measured 7”, so I cut 2 band pieces 2”X7”. You could cut them a bit shorter than the measured length and stretch them to fit if you’d like a tighter pocket opening. Fold your bands wrong sides together, then clip along the edge of your pocket piece, right sides together aligning the raw edges. Stitch the band in place using a 1/2” seam allowance, and press the seam down when finished. Place your pockets on top of your side panel pieces, and clip them in place. You could baste your pockets to the side panels along the sides and bottom, but I prefer to live on the edge and not baste them. :) Once your pockets are placed, you can finish assembling per the pattern, treating the side panels with the pockets as once piece and attach to the center panel.

And you’re done! It really is a pretty simple hack once you determine your ideal pocket size and angle! I love how this simple modification totally changes the look of the sweatshirt! I’d love to hear if you give this hack a try! I used some pink foil star French Terry from So Sew English for my sweatshirt. See similar fabric here!

And while we are on the subject of the Hudson patterns, here are some of our families Hudson’s. (With the center kangaroo pocket done per the pattern!)

Back to school Sewing - Bedtime edition

There are some people who like to sew up elaborate, fancy, dresses with lots of ruffles and lace. Then there are some who just like to sew up practical, comfortable, every day clothes. I am the latter. Strange as it may be to some, pajamas are one of my most favorite things to sew up. While going through my kids’ dressers and closets in preparation for going back to school, I realized one necessity we would definitely be needing was several new pairs of pajamas. Yay!

I have already made the kid’s each a pair, but I decided they also need to have a matching pair, and they were so excited about that idea! I chose a different colorway of the same striped fabric from So Sew English for each kid: the red/denim for my son and paired with it with a solid denim DBP, and the pink/lavender for my daughter and paired hers with a black polka dot DBP for the coordinate. The 11th hour gear pattern from New Horizons Designs is my go to pattern for pajamas. I love the fit of the t-shirt on both my son and my daughter, and the joggers are the perfect fit for my son. For my daughter’s pajama pants, I use the Carita joggers instead as she prefers that waistband.

These kiddos love these comfy jammies and have asked for a few more pairs to wear while these are in the wash. They’re lucky that I also love sewing basic clothes like this… and it also helps they are both so cute!!

Please note that this post contains links.  Some of these may be "affiliate links" which means that if you decide to make a purchase I get paid a tiny portion of whatever is purchased, but at no additional cost to you.  Affiliate payments go directly to my fabric fund to continue the cycle of sewing up or testing more patterns so I can share the love with you!

New Horizon Designs Carita Joggers

Truth be told, I really have never met a jogger pattern I didn't like. I knew the Carita Joggers from New Horizon's would be no exception as I love how all of her patterns are drafted.  I anticipated the fit to be similar to the Portlander Pants pattern, just with a tapered jogger leg instead of the flared leg... and wouldn't ya know it, the fit was exactly what I had hoped for! A couple other jogger patterns I've used, I've had to tweak a little bit to achieve the final look I wanted, but I didn't have to do a darn thing to the Carita's!  The fit was spot on, and the length was perfect!

Top 3 Things I love about the Carita Joggers:

  • I love that there are separate pattern pieces for the various inseam lengths. That saves me a whole bunch of time that I would normally have to spend lengthening/adjusting! 

  • I love the wide waistband.  It is really comfortable (and flattering!)

  • I love the included capri length. This again saves time I would have had to spend figuring out where to cut it for capri length and calculating the cuffs. It's already done for me!

Top 3 things I don't love about the Carita Joggers:

  •  They're not called the Jody Joggers. That has a nice ring to it, actually.

  •  They were tested and released when I was busy with summer activities and I couldn't participate in the test or sew them up right away. The travesty!

  •  They didn't come with that extra hour each day I keep asking for in order to sew up all the pairs I want to.

...Obviously I have nothing to actually include in the "don't loves"!  The fit is spot on and the instructions are fantastic!  Pure love from me!

Oh, and the little one likes hers too!! She was upset with me that I skipped her drawstring and pockets though.  I should know better.  She comes by her pocket obsession honestly.... I was just trying to save time and test out the fit first since she's up a size from where she used to fall on the size chart! I could have guessed the spot would be perfect, but I do always like to sew up a trial garment first. Its always a win when the trial run ends up fitting perfectly!

I love how the fabric choice will completely change the look of joggers too.  I made this pair with a space-dye performance fabric from So Sew English Fabrics for working out (or at least looking like I'll be working out...)  But a french terry or DBP pair would be another great casual choice, or they could be made in a liverpool fabric for a dressy look!  I can guarantee that I will make a pair in each of those fabric types listed in the very near future!

Please note that this post contains links.  Some of these may be "affiliate links" which means that if you decide to make a purchase I get paid a tiny portion of whatever is purchased, but at no additional cost to you.  Affiliate payments go directly to my fabric fund to continue the cycle of sewing up or testing more patterns so I can share the love with you!

Back to School 2018 with Made for Mermaids

Somehow, it's already time to start thinking about back to school again!  I haven't updated the blog since the last school year ended for my kids way back in May, so I guess you could say it has been enjoying a nice little summer hiatus too! 

PurpletealBTS001 copy.jpg

The Made for Mermaids team has put together a blog tour of back to school inspiration and I am so excited to be a part of it!  My little one has recently turned 5 and is off to Kindergarten in just a few weeks! {insert gasping and crying sounds} As crazy as it is to believe my baby is heading off to school, I know she is going to have the BEST time and will absolutely love elementary school. It helps that she will have the same awesome teacher that her older brother had last year!

The first order of business in preparing for school was to pick out her new backpack for the year.  After vetoing her first couple picks (I am NOT washing a light pink and fuzzy kitty backpack every other week, because lord knows how filthy backpacks get on the bus!) she picked out the absolute perfect backpack for her: a purple and teal flip sequin backpack.... and as an added bonus it comes with a matching lunch box! I *think* she likes it....

Next up was figuring out the perfect first day of school outfit.  It had to be a dress, but she already has so many in her closet that I needed to come up with something a little different.  I decided I haven't made her a new Vivienne dress in well over a year now, so that would definitely be something different than what's already in her closet! I started to dig through my (possibly excessive and overflowing) fabric stash, but nothing was jumping out to me to use. Suprise Suprise. So I started browsing my usual sites online and found this purple and teal geo fabric from So Sew English Fabrics that reminded me almost exactly of the flip sequins on my girly's new backpack! It was perfect!  I ordered it immediately and when it arrived, I set it out with a couple of my solid coordinates for her to pick from for the accents.  She chose both lilac and teal double brushed poly, and asked me to use one color on one side panel and the other for the second side panel.  I thought that may be a little much with the already busy fabric, so I had her pick just one solid coordinate, and she went with the lilac.  As I began to sew, though, I realized the two colors she picked were indeed perfect matches, so I decided to find another way to work both coordinates in as a surprise for her.  I remembered how much she loved pockets lately, too, so I decided to work the teal accents into the dress with the pockets and bindings.  When I showed her the final product she was SO excited!

I think this little lady is more than ready to head off to Kindergarten! :)

Be sure to check out the other stops on the Blog Tour. See the schedule below:

Greenstyle Creations New Swimsuit pattern - The North Shore

School is ending today for my oldest and the youngest is already done.... the pool is opening this weekend... and that means one thing: Swimsuit season is upon us!

I am so excited to have been able to test for a designer I've never worked with before!  I love Greenstyle Creations patterns and the athletic style and active lifestyle that she designs to!  I also love the fact that these patterns are drafted for a height of 5'7" which means I likely don't need to adjust too much for my height!

North Shore Swimsuit Options

North Shore Swimsuit Options

Greenstyle Creations has put out its first swimsuit pattern, The North Shore suit, and I don't think I can even list all of the different looks it can create!!  Thankfully, there is this awesome line drawing that helps illustrate all the options and different combinations.   It includes such a wide variety of options for coverage on both the top and bottom, it's absolutely amazing!


I generally prefer a very modest swimsuit but also want it to have some style! So, I chose to sew up a one piece (View A) with a full coverage front and the U  back.  I love the side cutouts to give it a little bit of interest!  The fit on this is spectacular and the only adjustment I made was to add a tiny bit of length to the bottoms.  Even though the pattern is drafted for someone 5'7", I typically have a longer torso than average, so I added just a 1/2" at the lengthen/shorten line of the bottoms and its perfect.  Other than that no adjustments or alterations were made. I measured an XXS for my bust and an XS for waist and hips, and the neat thing is I didn't even need to grade anything, I just used the XXS bodice pieces and XS bottoms pieces and attached them.  THIS is why sewing your own swimwear is a game changer.  Even though I am only one size different between my top and bottom, its hard to find swimwear that fits properly all over.  And with my taller than "average" height, store bought swimsuits are pretty much guaranteed to be too short. (Ready to Wear/RTW, i.e. store bought, clothing is most frequently drafted for people 5'5", which translates to clothes being about an 1" too short for those of us 5'7"!!)

I had gotten this nylon/Lycra swim fabric from Cali Fabrics last summer, and always knew it needed to be a one piece swimsuit to show off the awesome print. So glad I chose to use it for this suit as it is the perfect pairing!

I haven't decided which option I'm going to be making next...  but I will definitely make more of these suits as the fit is impeccable, the style is beautiful, and the options are almost endless! :)

Please note that this post contains links.  Some of these may be "affiliate links" which means that if you decide to make a purchase I get paid a tiny portion of whatever is purchased, but at no additional cost to you.  Affiliate payments go directly to my fabric fund to continue the cycle of sewing up or testing more patterns so I can share the love with you!

Petite Stitchery Juliet Leotard with M4M Bonny skirt

My little one has been asking me for months for a new leotard.  She only goes to dance once a week, so I kept putting it off and rotating our 4 store bought leotards for the time being!  I never pass up an opportunity to make my kiddos unique clothes though, so I finally moved "mama-made leotard" to the top of my "To Sew" list! And it turned out better than I could have every imagined!  I used the Juliet Leotard from Petite Stitchery & Co., which I have owned for a while anticipating making her one but never got around to until now.  She measured mostly for a size 5, but not quite into the 5 torso length.  I decided to go ahead and make a straight size 5 to allow a little growing room, and it fits perfect now, but will definitely last for quite a while still!  Her studio is not strict on dress code at this age thankfully, so I had some freedom of choice for fabric.  I still settled on a solid, but strayed from the typical black and light pink and used a Dark Ruby double brushed poly from So Sew English fabrics.  I lined it with some nude colored swim lining that I always keep on hand from Joann Fabrics.  I definitely see many, many, many more new Leotards in this little dancers future!

My daughter also likes to wear skirts to dance, and some of her store bought leos have attached skirts. I may hack an attached skirt onto my next version, but for this time I just made a simple circle skirt with a waistband using the Bonny pattern from Made for Mermaids.  I used some super glittery Lurex french terry, also from So Sew English fabrics, for the skirt. I used a black swim fabric for the waistband as I wanted it to be a little bit shiny to tie in with the glitter in the skirt.

This dance outfit was a total win with the little lady. The other dance moms loved her new look today as well! This may have been my first adventure into sewing leotards, but it definitely will not be my last!

Please note that this post contains links.  Some of these may be "affiliate links" which means that if you decide to make a purchase I get paid a tiny portion of whatever is purchased, but at no additional cost to you.  Affiliate payments go directly to my fabric fund to continue the cycle of sewing up or testing more patterns so I can share the love with you!

Striped Swallow Designs Sundown tank

I have had a vision of doing a tone on tone HTV for some time now.  I Finally made it happen this week!  I have also been wanting to make another Sundown Tank for yoga, so I combined everything I've been wanting to do in one awesome tank.  Exhibit A: my awesome mint colored tri-blend Sundown tank with an equally awesome mint colored "namaste" Mandala vinyl designed by the super talented Erin at Striped Swallow Designs. This project was seriously so simple, but its perfect and exactly what I've been wanting!


I had to create a Sundown Tank top for my daughter too, and since she's not yet into yoga, I went with a cut file from the new "Girl Power" themed collection, also by Erin for Striped Swallow Designs.  I chose the one that said "Sweet and Smart" because by gosh if those aren't the two top adjectives for my little lady!!  I opted for the twisted strap open back view for her as well for a sporty look. She also loved how this turned out and asked me to make some more for when it {finally} warms up!

We had a lot of fun taking pics together! And hey, she may be into yoga after all!

This fabric is the mint tri-blend from So Sew English.  I've been wanting to get some forever and finally picked some up for this project. I want to make a whole new basics wardrobe out of tri-blend!!! I will be getting more colors to make some more tanks and tees for me and the kiddos!

TAMI Hoodie - with faux piping and lined hood!

harperfloral002.jpg

The TAMI Revolution Hoodie by New Horizons is one of my most sewn patterns.  I'm such a hoodie and jeans kind of girl, and the fit is AMAZING.  I didn't mind the oversized fit of the pattern when it first was released, but I have to admit that the revised pattern with a slimmer fit is absolute perfection!  Since I make this pattern quite a bit, I wanted to find a way to add a little extra interest to it.  I've done the lined hood many times, but this go round I finally took the time to snap some tutorial pictures of the steps necessary to line a hood!  In addition, I added some faux piping along the shoulder curves, which I also snapped a few pictures of to share with you as well! Both are very simple modifications that just give a little extra something to this sweatshirt!

I'll share first how to add the faux piping accent for a super quick and easy way to add a fun detail.  For this, I just measured along the armsyce curves of the front and back bodice.  For my size XS, the back measured about 10.5" long, and the front curve measured 8.5" long.  I wanted my finished "piping" to be about 1/4" thick, which meant I had to cut my strips 1.25" wide to account for the fold and seam allowance!  I cut 2 strips 10.5" x 1.25" and 2 strips 8.5"x1.25".  I folded them in half, wrong sides together, and pressed them well.  After that, I just carefully curved them along the armsyce curve on the bodice pieces, and then finished assembling per the pattern!  By sewing these strips into the armsyce seams, and using a very careful and precise seam allowance, I ended up with perfect faux piping!  I purposefully cut my pieces on the bias as well, to help ease them into the curves of the armsyce when assembling, but that isn't completely necessary.

Next will be how to line the hood.  I have specifically shown how to line the crossover hood of this pattern, but the same steps would be used to line either the side opening hood and the standard hood, FYI!  First, you will cut 2 mirror images of your main fabric (floral) and your lining fabric (coral).  You will sew the main pieces together along the back curve right sides together, and the lining pieces right sides together.  You will then turn the hood lining right side out, and place it into the main hood, putting right sides together and aligning along the front curve. Clip together all along the front curve of the hood. (Side Note: It is important to cut your notches to help identify the different sides of the hood... the notches go along the bottom of the hood, where it attaches to the shirt. You do not want to sew your hood together here, you will want to make sure you sew it along the opening for your face, where there are no notches!) You will then sew your hood main and lining together using a 1 1/4" seam allowance. I know that sounds scary, and huge, but that is because you are not folding over and creating a casing like you normally would on an unlined hood.  I have marked a 1 1/4" seam allowance on my serger for this purpose!  After you have sewn it together, flip it right sides out and press.  You can topstitch along the edge you just sewed, but I do not.  Now, you will just treat your lined hood as one hood and attach per the pattern!

harperfloral001.jpg

All of this gorgeous fabric is from So Sew English Fabrics.  The floral is a Poly Rayon Spandex French Terry, the coral is a Double Brushed Polyester, and the faux piping is a tri-blend French Terry!

Please note that this post contains links.  Some of these may be "affiliate links" which means that if you decide to make a purchase I get paid a tiny portion of whatever is purchased, but at no additional cost to you.  Affiliate payments go directly to my fabric fund to continue the cycle of sewing up or testing more patterns so I can share the love with you!

Sewing my Stash - Solstice Wrap

So a big part of my sewing goal for 2018 is to "sew through my stash".  This includes my pattern stash, AND fabric stash.  Obviously "new" is always exciting and I can't cut myself off from any new purchases, so I'll be mixing new patterns and old fabric, and old fabric and new patterns to keep me on track!  Its my game plan for using up some of my older items, but still keeping me engaged and motivated!

I have had this sweater knit in my stash for several years now.  It came in a flawed bargain lot from Girl Charlee and I immediately fell in love with it. Its soft brushed sweater knit from way back before "brushed" was even a thing. :)  It was a 2 yard cut with a black streak along one edge. Still TONS of usable fabric, but I could never settle on a pattern to use it for!  I was scared to waste it, but I hated that it had been sitting unused for so long. Then one day, I saw a beautiful Solstice Wrap from Striped Swallow Designs that a sewing buddy made in a solid color and I realized that pattern would be perfect for this simple plaid too!  I had been wanting a pattern that could be office appropriate but still super cute, warm, and comfortable and sure enough the Solstice Wrap checked all those boxes!

I am glad I saved this fabric until I had improved my sewing.  There's quite a bit of hemming edges on this pattern... which I admit used to intimidate me with sweater knits in particular! But thankfully (thanks to my walking foot!) I've got that pretty much perfected and it was a breeze!  The sweater came together super quick and once I tried it on I realized it fit perfectly on my first try! that's what I call a  WIN!!

plaidsolstice001.jpg


Now that I've finally tried out this pattern I will be making a bunch more.  I think it would be awesome in french terry and double brushed poly as well!

Happy Sewing to you!

Striped Swallow Designs - Starry Night Sweatshirt

Well, looks like the holidays got in the way of getting updates made to the blog! There was lots of rushed sewing going on, but no time for sharing apparently!  One of the things I did work on right before Christmas and can finally share is the new Starry Night sweatshirt from Striped Swallow Designs. This design is cute and cozy!  Its the first of 4 upcoming releases in the newest collection, the Northern Lights Collection, which are all promised to be fancy sweatshirts! I can assure you I will own every one of them, since fancy + sweatshirts is the best combination possible!

The sweatshirt has long sleeves and a crew neck and a really neat gathered sleeve.  I believe the technical term for these sleeves would be a bishop sleeve.  A dress length was added later in testing and is the perfect additional option to the pattern!  I used one of my all time favorite floral french terry fabrics from So Sew English fabrics.  Its super springy, but has me thinking warm thoughts in this arctic blast we are currently living in!


I love a good sweatshirt that I can wear out and about and still feel cute in.  This one will get lots of wear, and I also can't wait to see what other designs are on the horizon for the rest of the collection! Stay tuned as I'll be sharing those as I make them as well!

Sew What do I Wear... Professional Edition

Since I have recently gone back to work part time... the type of clothing I now find myself sewing has shifted a little bit.  It used to be nothing but leggings and hoodies for this girl, but I am now drawn to more versatile pieces that I can wear to work.  Thankfully, I haven't gone back to a stiff corporate job that requires suits (bleh!), but I do still like to look professional at the office.  Which is why I am super excited to be a part of this blog tour that Made for Mermaids and Patterns for Pirates is putting on!

My office is far from fancy. In fact, its quite old and dingy and connected to a warehouse... I'm also the only female that works there, so for the most part, skirts are out for me, and I also don't like to wear anything too dressy either.... This is why the SOS pants are the perfection work bottoms for me!  They are still super comfy (shhh they are almost as comfy as leggings!) but look a lot more like "real" pants thanks to the pockets! I made this pair in a beautiful wine colored crushed velvet from Hobby Lobby.  I was a little nervous this would be a little too far outside of my normal comfort zone, but these look fantastic and are so comfortable to boot!  I wanted to keep the top sort of simple since the bottoms are a little wild, so I chose to make a Mama Tara top. It has simple lines, but a little bit of added interest with the front drape.  I didn't want just a solid top though, so I used this slinky black fabric I had in my stash that has some amazing raised gold pin dots on it.  Its still a subtle pattern that it doesn't compete with the texture of the pants. I had gotten this as a remnant at Hancock Fabrics years ago (well before they closed, sniff sniff) and had never found the right use for it until now! I did modify the sleeves to be above the elbow by taking 1.5" off the length of them, and I also made the neckline slightly narrower to give it a more dainty look.  I cut my neckband at 1.75" instead as I thought a narrower neckband would pair well with the dressier fabric.

I only work 2-3 half days a week, so I don't need a "full" professional wardrobe, and the best part of these pieces is I can totally pair them with other items in my closet to tone them done a bit and wear them for every day wear!  The top works just as well paired with jeans, and I've already worn the velvet pants with a more casual cardigan for every day wear too!

I hope you've gotten a little inspiration from my outfit for your own professional-wear looks! I plan to build on these pieces to create a work clothing "capsule" all centered around burgundy, black and gold. I love how the rich patterns and textures of these particular fabrics really dress up my very comfy outfit!

Be sure to stop by the other bloggers posts this week to see what all they have made. So many inspiring ideas! Find the blog post for each day below, which contains links to each bloggers site!

Day 1 : Day 2 : Day 3 : Day 4 : Day 5

Please note that this post contains links.  Some of these may be "affiliate links" which means that if you decide to make a purchase I get paid a tiny portion of whatever is purchased, but at no additional cost to you.  Affiliate payments go directly to my fabric fund to continue the cycle of sewing up or testing more patterns so I can share the love with you!

Made for Mermaids Darcey

Not too long ago I had put in an informal request to the Made for Mermaids ladies for a cardigan pattern.  Obviously, the team already has this pattern (Darcey and Mama Darcey) in process when I asked, but it worked out perfectly for me as I was in the market for a new cardigan pattern and got the opportunity to test this one!  I made 2 versions for myself, and 2 versions for my daughter during testing.  I also made her dolly a matching cardigan as well!  I did not branch out much with the options I used though (all tunic length with hoods), but I love all of the options this pattern includes and plan to make all of them very soon! Check out the galleries below for an (over) abundance of pictures!

Navy and Grey checked fabric from Joann's.

Floral sweater knit from Denver Fabrics.  I scooped this up for like $3 a yard a while ago and after making a top for myself, I had just enough left for the girl's sweater and then one for her dolly!

Sparkle French Terry from Hobby Lobby.  The lace up sides shown here is one of the hacks featured on the Made for Mermaids blog!

Please note that this post contains links.  Some of these may be "affiliate links" which means that if you decide to make a purchase I get paid a tiny portion of whatever is purchased, but at no additional cost to you.  Affiliate payments go directly to my fabric fund to continue the cycle of sewing up or testing more patterns so I can share the love with you!

New Horizon's Summit Peak hoodie

Now that it is starting to cool off, especially in the morning, my little man wants a whole bunch of new zip-up hoodies to wear to school.  He especially loves pockets so he can keep his hands warm waiting for his bus. He also prefers zip-ups over pullovers as they are easier for him to get off if he gets warm at school. So many requests! I came through for him right away though and whipped up one version to get him started for Fall weather.  I also already have a second cut out and can't wait to get it finished! The new Summit Peak Hoodie from New Horizon's is here, and you need it in your lineup of you sew for kids!

The interesting details on this hoodie are just amazing!  I was intimidated at first and thought it may be a very time consuming sew, but even with the zip I found it came together incredibly quickly! I love the way the cowl stands up and almost covers my sons mouth and chin. It makes it look just so cozy!

I used a hodge podge of fabrics I had in my stash, many of which I had also used for my husband's elevation hoodie, so he and my little guy coordinate!  I also accidentally used a zipper that was about an inch too short for my size because I measured it incorrectly.  The pattern instructions are dead on for what zipper length to use.... this was complete user error!

My little dude adores his sweatshirt and was so grateful for it!  Can't wait to make the precious little guy a whole bunch more!

Please note that this post contains links.  Some of these may be "affiliate links" which means that if you decide to make a purchase I get paid a tiny portion of whatever is purchased, but at no additional cost to you.  Affiliate payments go directly to my fabric fund to continue the cycle of sewing up or testing more patterns so I can share the love with you!

New Horizons Bali blouse featuring a full back hack

I admit I am generally drawn to knit patterns before anything else.  But when I do finally use a pattern designed for wovens, I always question why I don't use them more!!  I had not made a Bali Blouse from New Horizon's Designs since I was a tester for it, which was well over a year ago.  I LOVE my Bali blouse I made in testing and wear it frequently.  But with the open back, I am little limited as to when and where I can use it.  I wanted to be able to wear a Bali blouse to work, so I did a very simple hack and made it with a full back instead of the open back!  I happened to have an awesome Rayon Challis in my stash from So Sew English that was perfect for this top!

I adore the little details this pattern has.  The button tabs on the sleeves and front gathering are per the pattern, and the pleat detail is part of my hack.  I wanted it to have the necessary ease, but I also wanted to make the hack as simple as possible.  Enter, the simple pleat!

Promopiece010.jpg

All I did was take my angled back piece, and give it a straight edge at the center notch marking at the top.  I had to add a little extra at the bottom corner to fill in the pattern piece, so pardon the blue painters tape in the picture, but it was really easy to modify the pattern piece!  Instead of cutting two mirror image back pieces, I cut one on the fold.  I did place my pattern piece about 1.5" off the fold line and cut it to give that extra ease. (Also note, I used the "slim fit" pattern piece for this!) Then I added a pleat at the top center to make the piece fit the yoke part.  I originally planned to gather the back piece along the top center, but decided I didn't want gathering on both the front and back, so I swapped it out for a pleat instead.  I love the clean look it gives!

I am so pleased with how this top turned out!  I plan to wear it to work this week, and then want to make a whole bunch more!

Please note that this post contains links.  Some of these may be "affiliate links" which means that if you decide to make a purchase I get paid a tiny portion of whatever is purchased, but at no additional cost to you.  Affiliate payments go directly to my fabric fund to continue the cycle of sewing up or testing more patterns so I can share the love with you!

Harbor Knot tee (times two) from Striped Swallow Designs

Sometimes I'm late to pick up on trends because I just don't love them. Sometimes I'm late to pick up on trends because I'm just late to the party.  The latter is the case for why I'm just now making the Harbor Knot tee from Striped Swallow Designs.  I know this pattern came out months ago, but it just never found itself at the top of my "to sew" list until now.  And man, am I kind of mad at myself for missing out on it for the past few months!  I recently took a peek through my closet to see what sort of pieces I was missing.  Turns out, I'm definitely low on long sleeve t-shirts.  I decided to make some interesting tops by using the harbor knot pattern.  I went with the slimmer/lower knot version as I prefer the look of that one. 

I made one top in a lightweight performance fabric since the athleisure trend is one I jumped into right away and will not ever willingly let fade!  I wear athletic leggings and tennis shoes frequently, but realized I don't have many mid weight workout tops.  I have lots of tanks and hoodies, but not much in between.  Enter my new neon pink Harbor Knot tee!  Its cute enough to wear around as an athleisure type top for preschool pick ups and errand running, but it can function as an actual workout top if I'm able to squeeze a workout in as well!  You'll notice the knot is on the opposite hip on this version... and that's because I hadn't realized I was cutting on the wrong side of my performance fabric!  Even with having cut my pieces backwards, the instructions for constructing the knot were so easy to follow!

The second version I made with a floral double brushed poly from So Sew English.  I wanted it to be a little dressier so I could wear it to work with slacks, but also pair well with jeans for a more casual look.  Once again, it turned out exactly as I envisioned!  I definitely will be making more in 3/4 and short sleeves as its such a flattering and interesting piece!  And, I think in the spring I'll have to get myself the add-on for the tank version as well!

Please note that this post contains links.  Some of these may be "affiliate links" which means that if you decide to make a purchase I get paid a tiny portion of whatever is purchased, but at no additional cost to you.  Affiliate payments go directly to my fabric fund to continue the cycle of sewing up or testing more patterns so I can share the love with you!

Sewing Portfolios Ambassador Project

Let me first start off by saying, if you are a sewing blogger, pattern tester, fabric designer or pattern designer and you are NOT a member of Sewing Portfolios.com, then you need to become one.  Its such a cool concept for matching up collaborators for pattern testing and other projects... and the kicker is, membership is FREE on the site! There are business members and individual members.  As an individual member you can create a portfolio of all the projects you've done and share the details. Business members can then view your portfolio and decide if you'd be a match for their project.  I highly recommend taking a peek at the Sewing Portfolios site and checking it our for yourself!  I have a long list of projects I want to add to my own profile, but haven't found the time to sit down and do that. Becuase, as many of you can probably relate, I'd rather use my free time for sewing!

So about this particular project.  I was sent 3 Half yard cuts of coordinates from the "Catching Dreams" Collection fabrics in "midnite" from Michael Miller Fabrics for being a sewing portfolio ambassador.  I had it in my head I wanted to try to make the Vera Dress from Debbie Brooke Designs, but wasn't entirely positive I could squeeze it out of just 3 half yard cuts.  I played around with the pieces and realized I could absolutely make it fit it just by shrinking the skirt width by about 3/4".  I also wanted to switch up the bodice ruffle a bit so I could show off the fussy cut horse I placed there, so I made two ruffles and put them on either side of the bodice center panel instead of centering a ruffle down the middle as the pattern calls for. I also shortened the length of the skirt a tiny bit as well for personal preference.

All in all, this project was a smashing success! I am so thankful I am part of the Sewing Portfolios Community and was able to do this project with the lovely Michael Miller Fabrics I was provided!